You want a thin, crispy pizza crust that holds toppings without sogging. You’ll use a low-hydration dough, tight kneading, and a very hot stone or steel to get a strong, blistered base. You’ll time fermentation for flavor and texture. I’ll give the exact recipe, steps, and why each choice matters—so you can reproduce it reliably.
Ingredients and Measurements
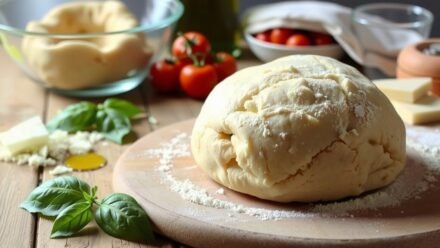
For one 12–14 inch thin-crust pizza (about 2 medium crusts), you’ll need 300 g (2 1/2 cups) strong bread flour, 165–180 g (55–60% hydration) water at 20–24°C, 6 g (1 1/4 tsp) fine sea salt, 3 g (3/4 tsp) active dry yeast, and 10 g (2 tsp) olive oil; optionally add 2–4 g (1/2–1 tsp) sugar to feed the yeast. Use a scale for accuracy. If you want more crusts, scale ingredients linearly and maintain hydration percentage. For wetter dough increase water in small increments; for firmer dough reduce water. Measure salt and yeast precisely; small deviations change fermentation and handling. If you plan cold fermentation, double-check yeast quantity and shorten proofing. Store unused flour and yeast sealed properly, away from moisture and heat.
Key Ingredients Explained

You’ll choose flour by protein content—00 or high-gluten for maximum structure, all-purpose for a balanced chew—because it controls gluten development. You’ll control fermentation with yeast type and amount—instant, active dry, or fresh—adjusting proofing time to tune rise and flavor. You’ll use salt for flavor and dough strength and a small amount of oil to tenderize and aid handling, balancing them to avoid slack or toughness.
Flour Types and Roles
Flour choice determines dough strength, extensibility, and the final crust texture. You’ll use protein content to predict behavior: higher protein (12–14%) yields stronger gluten, more chew and structure; lower protein (9–11%) gives a tender, less elastic dough. Use bread flour for a springy, slightly chewy thin crust; all-purpose is versatile and predictable. 00 flour—finely milled with medium protein—improves extensibility and surface smoothness, producing a crisp exterior when baked hot. Whole wheat adds flavor and absorbs more water; mix with white flour to retain extensibility. Semolina or durum adds nuttiness and increases crust crunch when used sparingly. Adjust hydration for absorption differences, and use low-dose flour for dusting to prevent sticking without altering dough composition. You’ll weigh flour for consistency and control mixing outcomes precisely.
Yeast Function and Options
Although it might seem simple, yeast converts sugars into carbon dioxide and ethanol, and that activity controls rise rate, crumb openness, and flavor development. You choose between active dry, instant, fresh, and sourdough cultures based on timing and flavor goals. Instant mixes into flour for faster starts; active dry needs hydration; fresh gives subtle aroma; sourdough adds complex acidity and slower fermentation. Control fermentation with temperature and yeast amount; lower temps for longer flavor, higher for speed. Monitor dough elasticity and gas retention, not just time. Practical substitutions: use 0.4–0.8% instant yeast by flour weight for room-temperature bulk ferment. Reference chart below for quick comparison.
| Type | Notes |
|---|---|
| Instant | Mixes; fast |
| Active dry | Hydrate first; reliable |
| Fresh | High moisture; short life |
| Sourdough | Complex flavor; slow |
Salt and Oil Balance
After controlling fermentation and yeast activity, set the salt and oil to refine dough performance: salt (usually 1.8–2.2% of flour weight) tempers yeast activity, tightens the gluten network, and seasons the crumb, while oil (commonly 1–4%, with 1–2% typical for thin crust) coats proteins, increases extensibility, and improves oven browning and mouthfeel. Use baker’s percentages to calculate accurately; weigh ingredients. If you’ll want a crisper edge, stay at lower oil and upper salt range; for more extensibility and softer bite, raise oil toward 2–3% and reduce salt slightly. Add salt to the dough mix after initial hydration to avoid over-inhibition of yeast in early autolyse. Mix thoroughly but avoid overoxidation; oil reduces surface drying during bench proofing. Adjust within ranges based on tasting results.
Equipment You’ll Need
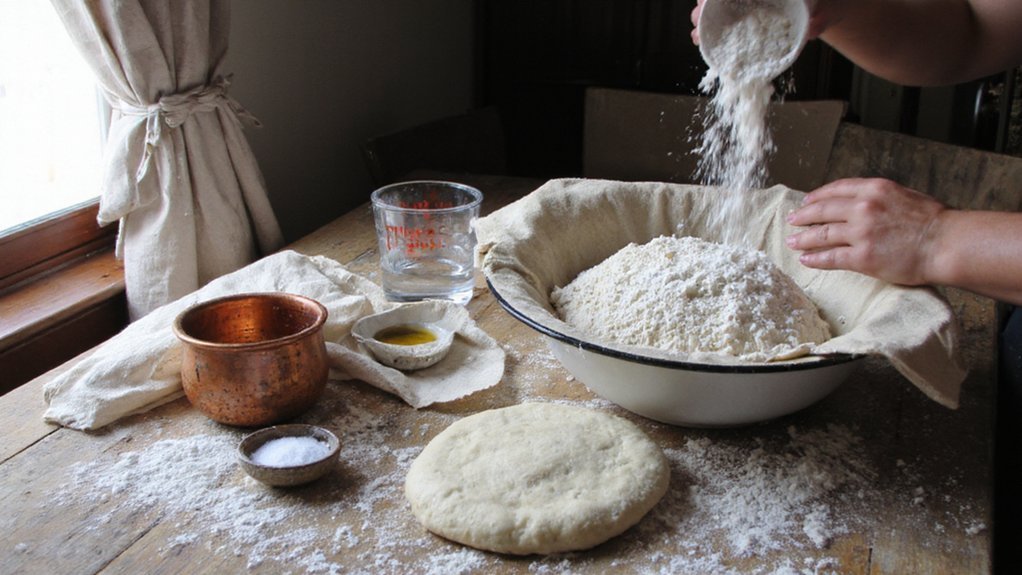
What tools will you need to make a thin, crisp crust? A digital scale for precise flour and water measurements; measuring spoons for yeast and salt; a bench scraper to portion and handle dough cleanly. You’ll want a large mixing bowl, and a stand mixer with a dough hook if you prefer mechanized kneading. A pizza stone or steel provides high, even heat; a sturdy peel with perforations lets you launch pies without sticking; fine semolina or cornmeal on the peel prevents adhesion. Use an infrared thermometer to verify oven or steel temperature. A rolling pin is optional, while a dough docker reduces bubbles. Also have a reliable timer, heavy-duty oven mitts, and a sharp pizza cutter. Keep tools clean and calibrated for results.
Step-by-Step Dough Preparation
First, you gather precise quantities of flour, water, yeast, salt, and oil on a clean scale and work surface. Then you mix to a cohesive mass and knead 8–10 minutes (or until the windowpane forms) to develop gluten. Finally, you proof at 21–24°C until doubled, then degas and shape thin rounds for baking.
Gather Ingredients
You’ll need: high-protein flour (00 or bread flour, about 300–360 g), water at 60–65°F (180–235 g for 60–65% hydration), instant yeast (2–4 g), fine salt (6–8 g), and optional olive oil (5–10 g). Measure on a digital scale; accuracy ±1 g. Use room-temperature ingredients; water temperature specified accounts for ambient conditions and desired dough temperature. Choose yeast low in moisture—instant preferred for direct incorporation. Weigh salt separately to avoid yeast contact before mixing. If using olive oil, include for extensibility and slight crispness; omit for leaner crust. Prepare a clean bowl and bench, and have a bench scraper, dough knife, and a covered container for bulk fermentation ready. Pre-check flour hydration potential—adjust water within the given range based on brand and humidity. and storage.
Mixing and Kneading
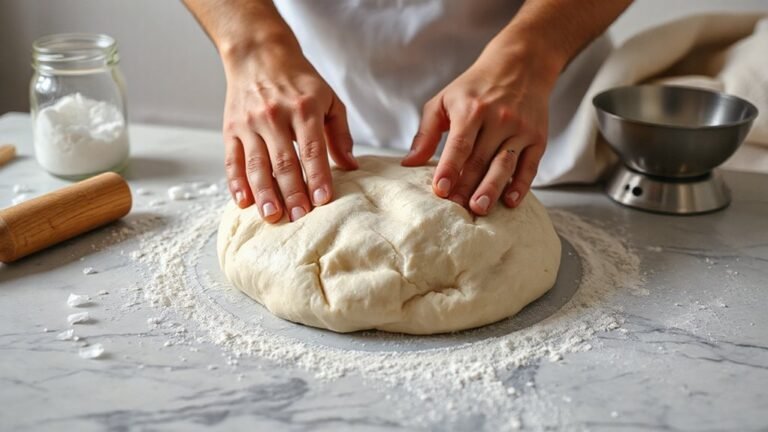
When you combine the measured flour, salt (kept separate from the yeast), and instant yeast, pour in the specified water and mix until a shaggy mass forms; add the olive oil, if using, after initial hydration so it incorporates without inhibiting gluten development. Use a bench scraper to consolidate; resist adding more flour. Knead 8–10 minutes by hand or 6–7 minutes in a mixer on low-medium speed until the dough is smooth, slightly tacky, and exhibits windowpane resilience. Test periodically: stretch a small piece to check for a thin translucent membrane. If tearing occurs, continue kneading; if overly sticky, add flour in 5–10 gram increments. Rest the dough 5 minutes during long kneads to relax gluten, then resume for ideal extensibility and hydration control.
Proofing and Shaping
Allow the dough to bulk-proof in a lightly oiled, covered container at 75–78°F (24–26°C) until it’s about doubled—typically 60–90 minutes—or retard it in the refrigerator for 24–72 hours to develop flavor and strength. After bulk proof, divide dough into portions (200–280g for thin crust), rest 10–20 minutes under plastic to relax the gluten. On a lightly floured surface, press from center to edge with your fingers, then use a controlled stretch and gravity toss if you can; keep a defined rim for crispness. Transfer to a baking peel dusted with semolina or fine cornmeal. Dock or dock selectively to prevent large bubbles. Proof on peel 20–30 minutes at room temperature before topping. Bake immediately for best oven spring. Don’t overload; aim for thin coverage.
Kneading and Gluten Development
Developing gluten requires focused kneading to align the glutenin and gliadin proteins into a stretchy network that gives thin-crust dough its strength and extensibility. You’ll work the dough on a lightly floured surface using a push-fold-turn rhythm, applying consistent pressure to stretch then fold the matrix. Aim for 6–10 minutes by hand or 4–6 minutes at low speed in a mixer, adjusting for hydration and flour type. Watch for a smooth, slightly tacky surface and elasticity that resists tearing. Use the windowpane test: stretch a small piece until it forms a thin, translucent membrane without breaking. If it tears, continue short kneading bursts with 5–10 minute bench rests to relax the gluten, then reassess. Don’t overknead; stop when extensibility and strength are balanced adequately.
Bulk Fermentation Options (Fast Vs Slow)
You can use a fast bulk fermentation (more yeast, warmer temps) to speed production and get predictable oven spring. Or you can use a slow, cold bulk ferment (less yeast, refrigeration) to build more complex flavor and stronger dough structure. You’ll balance fermentation time against flavor: shorter equals quicker throughput, longer increases acidity and aroma.
Fast Fermentation Pros
While fast fermentation sacrifices some depth of flavor, it gives you predictable, rapid bulk rise so you can move from mixing to shaping in a few hours instead of overnight. You control timing with higher yeast dosage, warmer temperatures (24–28°C), and slightly increased hydration to accelerate enzymatic activity and gluten development. Expect tighter crumb, less pronounced sourness, and more immediate extensibility for thin-crust shaping. Use shorter bench rests and gentle degassing to preserve gas cells while achieving oven spring. Monitor dough temperature with a probe; aim for 25°C internal after mix for consistent results. Proofing trays and covered containers minimize skinning. If you need same-day production, fast ferment reduces schedule variability and scaling issues without complex equipment, letting you produce crisp, thin pizzas reliably.
Slow Fermentation Pros
Although it takes longer, slow bulk fermentation gives you deeper flavor and better gluten structure by letting enzymes and yeast work at a lower, controlled rate. You’ll get improved extensibility and strength: gluten aligns gradually, reducing tearing and improving stretchability for very thin pies. The dough develops more complex aromatics and sugars without overproofing, so browning and crust nuance are enhanced. Cold fermentation increases dough tolerance; you can hold and retarget dough portions with less risk of collapse. Fermentation also reduces slackness, making shaping more predictable and speeding bench time. Yeast activity is steadier, so you’ll need less yeast and can fine-tune temperature to control rise. Overall, slow bulk fermentation gives you a more manageable dough and superior structural properties for thin crusts.
Fermentation Time Vs Flavor
If you speed up bulk fermentation by raising temperature or increasing yeast, you’ll get quicker rise but less developed flavor and weaker gluten organization; conversely, slowing fermentation—lower temps and minimal yeast—promotes enzymatic breakdown of starches and proteins, producing more sugars, acids, and aromatic compounds while improving dough strength and tolerance. Choose based on time, desired flavor, and handling. Fast bulk (1–2 hours) gives mild taste, rapid schedule, but lower extensibility. Slow bulk (12–48 hours, cool) intensifies flavor, increases acidity and maltose, and yields stronger, more tolerant dough. Control fermentation with temperature charts, yeast fractioning, and timing. Use cold retardation for flexibility. Monitor dough by volume and feel, not clock.
- Fast: quick, mild, schedule
- Slow: complex, strong, structured
- Hybrid: split, balanced, flexible
Shaping and Stretching Techniques
Positioning the dough on a lightly floured surface, you’ll press from the center outward to form a uniform disc, then lift and stretch it over your knuckles to thin the center while keeping a slightly thicker rim. Rotate the disc with your free hand after a few presses to maintain circularity and even thickness. Use fingertip pressure rather than palms to avoid compressing gas pockets. If the dough resists, let it rest 5–10 minutes under a bowl to relax the gluten, then resume. Keep the rim intact by stopping stretch just before it reaches your knuckles. Transfer using a peel or inverted baking sheet, supporting the underside to prevent tears. Trim uneven edges with shears. Work methodically; consistent motions yield predictable and precise results.
Tips for Extra Crunch
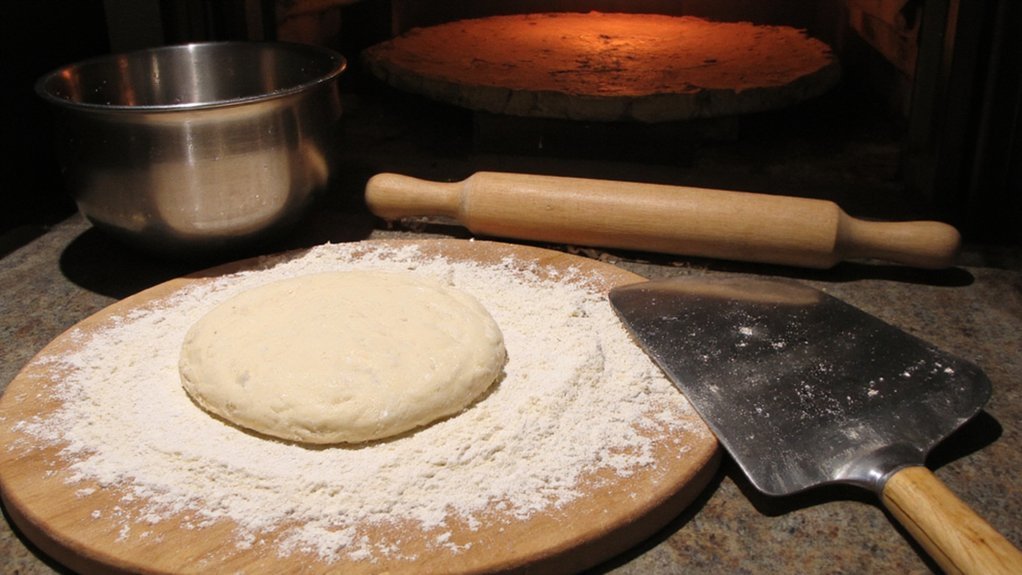
To get extra crunch, bake on a preheated pizza stone or steel at the highest safe oven temperature you can reach; the intense radiant heat crisps the bottom quickly without overcooking toppings. Focus on dough handling and surface treatments: stretch thin, degas gently to avoid large air pockets, and pat the outer rim drier than the center to reduce moisture. Use light, evenly distributed toppings; excess sauce or wet ingredients will steam the crust.
- Reduce hydration by 2-4% for a snappier crumb; adjust for flour absorption without overproofing.
- Dock or perforate center lightly to prevent large blisters while keeping edge puffy; target controlled venting.
- Dust peel with semolina or fine cornmeal to promote release and surface crisping for immediate crisp bite.
Baking Temperatures and Methods
When you crank your oven to its highest safe setting and preheat a stone or steel for at least 45–60 minutes, you’ll get the rapid radiant heat that crisps thin crusts without overcooking toppings. Use 500–540°C (930–1000°F) only with professional equipment; home ovens perform best at 260–300°C (500–572°F). Position the stone/steel on the lowest rack to maximize bottom heat. Slide the pizza onto the hot surface using a well-floured peel; bake 5–8 minutes at higher temps, 8–12 minutes at moderate temps. For even browning, rotate the pizza halfway through. If you lack a stone/steel, use an inverted heavy-duty baking sheet preheated similarly. Avoid adding wet toppings that lower surface temperature. Finish under broiler for 30–60 seconds if needed. Monitor internal crust color, not time.
Storing and Reheating Dough
After you’ve dialed in oven temps and bake times, proper storage and controlled rewarming preserve dough strength and oven spring. Cool bulk dough to room temperature, then portion and oil surfaces to prevent drying. For short-term hold, proof at 4°C up to 48 hours; for longer storage, freeze flattened dough in airtight bags. Thaw and temper slowly to avoid condensation that weakens the gluten.
- Refrigeration: 4°C, up to 48 hours, minimal handling.
- Freezing: double-wrap, freeze flat, thaw 24 hours in fridge.
- Rewarming: bring to 18–20°C for 60–90 minutes before shaping; avoid microwave.
Follow these parameters and you’ll retain extensibility, gas retention, and predictable oven spring. Adjust times for dough hydration and yeast activity; colder dough needs longer tempering. Plan accordingly, always.
Conclusion
You’ll get a crisp, thin crust by following the measured recipe, proper kneading, and high-heat baking. Mix to a smooth, tacky dough, ferment 60 to 90 minutes or retard 24 to 72 hours for flavor, then shape thin with a slightly thicker rim. Use a preheated stone or steel at the oven’s highest setting, slide the pizza on and bake until golden and crisp. Store dough refrigerated short-term or freeze for longer and maintain hydration.