You’ll achieve a thick crust that’s both fluffy and chewy by controlling flour protein, 62–68% hydration, and precise handling. Start with a short autolyse, knead to a clean windowpane, then bulk ferment with one or two gentle folds to build gas. I’ll give exact timings, technique cues, and oven tricks to maximize oven spring—keep going to master the final steps.
Ingredients and Measurements

You’ll measure ingredients by weight and use baker’s percentages for consistency: set flour as 100%, water 65% (adjust 62–70% for desired crumb), salt 2%, instant yeast 0.5–1% (lower for long cold fermentation), and olive oil 2–4% to enrich the dough; for household conversions, a 900 g (about 7 cups) flour batch with 585 g water, 18 g salt, 4–9 g instant yeast, and 18–36 g oil yields enough dough for a 12–14-inch thick-crust pie. Use high-protein bread flour (11.5–13.5% protein) for structure and chew; blend with a portion of all-purpose to soften. Add 1–2% sugar or malt to enhance browning and yeast activity. Keep water temperature and yeast percentage correlated to fermentation schedule. Salt goes into the dough, not on yeast; oil distributes evenly.
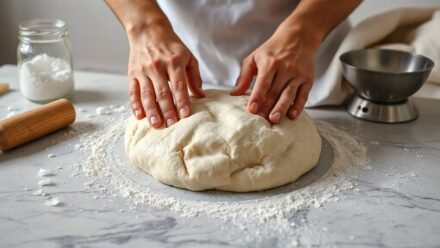
Mixing and Kneading the Dough

Starting with an autolyse improves gluten formation and shortens active kneading time: mix flour and water until just combined, rest 20–30 minutes, then add salt, yeast, and oil. You’ll combine ingredients until dough is cohesive, using a dough hook at low speed or by hand. Target dough temperature 24°C–26°C; adjust water or environment to hit range. Knead until the dough passes a windowpane test: thin, translucent film without tearing. Use 6–10 minutes mechanical or 8–12 minutes manual kneading, incorporating periodic 1–2 minute bench rests to relax the gluten and ease handling. Finish with a smooth, slightly tacky surface and uniform gluten network. Avoid over-kneading; excessive strength yields tight crumb and reduced extensibility during shaping. Monitor dough hydration and adjust by tablespoons of water.
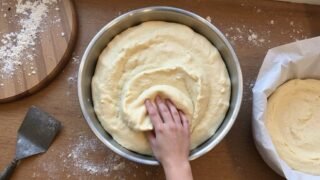
First Rise and Fermentation
After kneading, move the dough into a lightly oiled, lidded container for bulk fermentation to develop gas, flavor, and structure. Maintain dough temperature between 24–27°C (75–80°F) for a moderate yeast activity; lower temperatures slow fermentation and increase enzymatic flavor development. Expect 1.5–3 hours at room temperature until the dough increases 30–50% and shows gas pockets and extensibility. You monitor dough temperature and CO2 production; use time as secondary metric. For longer flavor development, retard the dough at 4°C for 12–72 hours; bring back to room temperature before using. Perform minimal degassing: fold once or twice to redistribute yeast and strengthen gluten without exhausting gas. Record timing and temperature to reproduce consistent crumb and oven spring. Adjust hydration or yeast to control fermentation rate precisely.
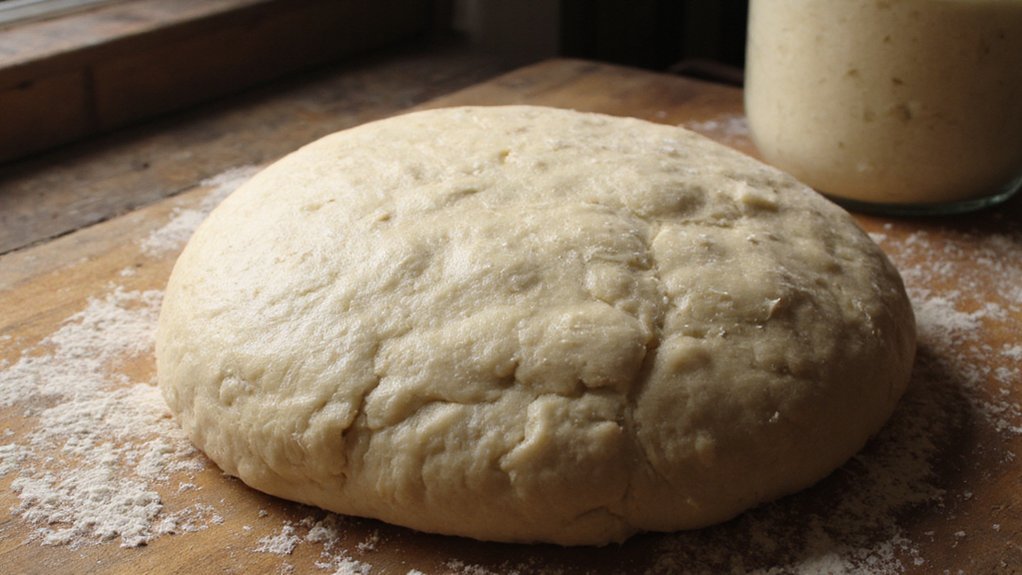
Shaping and Proofing the Crust
Shaping the dough into a tight round and developing an even rim sets the final crumb structure and oven spring, so handle the bulk-fermented dough gently to preserve gas while building surface tension. You’ll degas just enough, perform controlled folds, and bench-rest to relax gluten before final shaping. Tighten the skin by rotating and dragging on the bench; don’t tear. Final proof should be warm and humid for predictable expansion; monitor volume, not time.
- pale, glossy skin with slight resistance
- evenly tapered rim, smooth surface
- micro-bubbles under dough skin
- gentle dome when pressed, slow rebound
- slight jounce without collapse
Use refrigeration for retardation when you need flavor control; avoid overproofing—structure collapses. Score the rim only after final proof completes.
Baking Techniques and Topping Tips
When you bake thick-crust pizza, maximize oven heat and conductive mass—preheat a pizza steel or stone at 500–550°F (260–290°C) for at least 45–60 minutes so the base gets immediate, even radiant and conductive transfer. Use a high initial temperature to set the crust quickly, then reduce to 425–475°F (220–245°C) after 6–8 minutes if needed to finish interior without burning toppings. Docking lightly and par-baking for 4–6 minutes stabilizes shape for heavy toppings. Apply sauce sparingly and choose moisture-controlled cheeses; dry or drain wet ingredients to prevent soggy middles. Layer toppings by cook-time: long-cook meats and dense vegetables first, delicate herbs last. Rotate on the stone for browning and probe internal dough temperature—it’s about 200–205°F (93–96°C) for a fully baked, tender crumb and serve hot.
Conclusion
You’ll get a thick‑crust pizza that’s both fluffy and chewy by following these steps. Use high‑protein flour and 62–68% hydration, autolyse briefly, then add salt, yeast, and oil. Knead to a smooth, slightly tacky windowpane, bulk ferment until volume rises 30–50% with one or two folds, shape gently to retain gas, proof until puffy and slightly resistant, then bake on a preheated stone at very high heat for ideal oven spring and crumb color development.