You can make a reliable, no‑yeast pizza crust with just Greek yogurt and self‑rising flour. Mix, knead briefly, rest, then stretch or roll for a thin or puffy base. I’ll show precise ratios, oven tricks, and small tweaks—salt, oil, and hydration—so the dough bakes crisp and browns evenly. Keep going to learn the single tweak that transforms this quick dough into something nearly yeasted.
Ingredients and Measurements

Use equal weights of self‑rising flour and plain Greek yogurt—about 250 g of each will make one 12″ crust. You’ll measure by weight for consistency; if you only have cups, that’s roughly 2 cups of flour and 1 cup plus 3 tablespoons of packed yogurt. Add 1/2 teaspoon fine salt to the combined ingredients to enhance flavor; a tablespoon of olive oil will increase extensibility and browning. For a sturdier, thicker crust, increase each ingredient by 25%. For a thinner crust, reduce both by 20%. If your yogurt is very wet, stir in up to 1 tablespoon extra flour; if the dough’s dry, add 1 teaspoon water at a time. Keep ratios exact. You’ll avoid substitutions that break the simple chemistry of this dough.
Equipment You’ll Need

You’ll need a large mixing bowl and a sturdy spoon to combine the dough. Use accurate measuring cups and spoons to get the water-to-flour ratio right. Finish with a rimmed baking sheet or a cast-iron skillet to shape and bake the crust.
Mixing Bowl and Spoon
A medium mixing bowl and a sturdy spoon will let you combine the two ingredients cleanly and control hydration. Choose a nonreactive bowl—stainless steel, glass, or ceramic—with at least a 2–3 quart capacity so you have room to stir and fold without spills. Sloped sides help you gather dough and monitor texture. A heavy-weight base prevents sliding while you work. Use a stiff spoon—wood or rigid silicone—with a comfortable handle that won’t flex when you press. The spoon should scrape the bowl’s side and fold the mixture to develop cohesion; you’ll get a feel for tackiness and elasticity. Cleanliness and easy scraping speed up adjustments. When mixing, work briskly and stop as soon as the dough forms a uniform mass. Then proceed to shape.
Measuring Cups and Spoons
The right measuring cups and spoons make accurate hydration simple. You’ll want a set of dry measuring cups (1/4, 1/3, 1/2, 1 cup) and nesting spoons (1/4 tsp through 1 tbsp). Use the dry cups for flour and the spoons for baking powder or salt so proportions stay exact. Pick stainless steel or rigid plastic for durable, easy-to-level fills. A level edge—bench scraper or flat knife—helps you remove excess flour without compressing it. For yogurt, a 1-cup liquid measure with clear markings speeds transfers and guarantees you hit the 1:1 ratio this recipe needs. Markings should be readable and etched or engraved. Accurate measuring eliminates guesswork, gives consistent dough texture, and shortens troubleshooting. Store sets together so you always have the right tool at hand ready.
Baking Sheet or Skillet
If you want a crisp, blistered crust, preheat a cast‑iron skillet; for thin, evenly baked pies, use a rimmed baking sheet lined with parchment or lightly oiled. Choose the skillet when you want high, focused heat that mimics a pizza stone; it gives rapid oven spring and charred edges. Heat it in the oven for at least 20 minutes before stretching dough. Use a rimmed baking sheet if you need more surface area, easier handling, or want to bake multiple pies at once. Line the sheet to prevent sticking and transfer dough with a peel or spatula. Either tool needs a hot oven (450–500°F/230–260°C). You’ll get better results if you avoid overcrowding and monitor bake time closely. Adjust placement for even browning every bake.
Step-by-Step Dough Preparation

You’ll measure the flour and yogurt precisely to hit the right hydration for a pliable dough. Then you’ll mix until no dry streaks remain and knead briefly on a lightly floured surface until smooth and elastic. Keep movements efficient to prevent overworking while controlling stickiness.
Measuring Ingredients
Before you mix, measure both ingredients precisely so the dough’s hydration stays consistent. Use a kitchen scale; grams are exact. For this recipe, weigh 170g self‑rising flour and 170g Greek yogurt or proportions specified. Spoon flour into the scale pan—don’t scoop—to avoid compaction. Use full‑fat yogurt for predictable moisture. Note room temperature: cold yogurt will register differently on a scale if you account for condensation.
- Anticipation: you’ll feel ready when scales click.
- Control: accuracy removes guesswork and anxiety.
- Confidence: consistent measurements deliver repeatable results.
- Pride: precise baking shows care.
- Relief: predictable dough means fewer surprises.
Record measurements the first time; small tweaks are acceptable next batch. Measure with intent, and you’ll build a reliable baseline for every future crust you make—consistently and confidently.
Mixing and Kneading
Now that you’ve measured precisely, combine the 170 g self‑rising flour and 170 g Greek yogurt in a mixing bowl and stir with a spatula until a shaggy mass forms. Turn the dough onto a lightly floured surface. Use your hands to press and fold the dough, bringing edges to the center for about 1–2 minutes; it should cohere but remain slightly tacky. If it’s too sticky, sprinkle a teaspoon of flour at a time. If it’s dry, dampen fingers and knead until elasticity appears. Aim for a smooth, uniform ball without overworking—the dough doesn’t need long. Form into a tight ball, cover with a clean towel, and rest for 10 minutes to relax gluten and ease shaping. You’re ready to shape and top now.
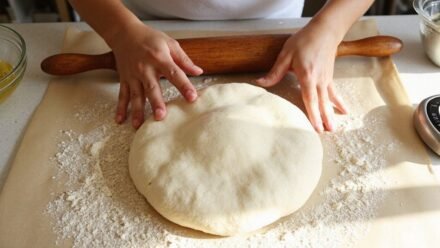
Shaping and Topping Techniques
Stretching the dough gently gives you a thin, even crust without tearing. Use your fingertips to press from center outward, leaving a slightly thicker edge for grip. When you transfer the base, dust with semolina or flour to prevent sticking. Keep toppings light—wet ingredients sog the dough and overpower the yogurt base. Layer flavors thoughtfully: sauce, cheese, then delicate herbs or thin-sliced vegetables. For emotional engagement, choose toppings that remind you of home or celebration:
- Fresh basil that brightens every bite
- Sweet roasted peppers that comfort
- Lively lemon zest for unexpected joy
- Melty mozzarella that soothes
- Crispy prosciutto for indulgence
Finish by pressing toppings gently into the surface so they adhere and cook evenly. You’ll appreciate the crisp edges and balanced bite every time.
Baking Methods and Timing
Timing governs crust texture and topping melt; choose a baking method—stone or steel for intense radiant heat, cast-iron skillet for deep crispness, or a rimmed baking sheet for convenience—that matches the result you want, and preheat your oven to 475–500°F (245–260°C) so the dough sets quickly and toppings cook evenly. Use a pizza peel or inverted sheet to transfer quickly onto a hot surface; avoid opening the oven during the first 6–8 minutes. Bake smaller pizzas 8–10 minutes; larger or thicker ones 12–15 minutes, watching for a golden-brown rim and blistering. If you use a skillet, finish under the broiler 1–2 minutes for top browning. Let the pizza rest 2–3 minutes before slicing to stabilize toppings and cut cleanly. Watch color and bottom crispness.
Variations: Thin, Thick, and Stuffed Crusts
Choosing a crust style changes how you handle the dough, how long you bake it, and the texture you’ll get. For thin crust, roll the dough very thin, par-bake briefly, then finish with toppings; you’ll get crisp edges and quick bake times. For thick crust, press gently, leave loft, bake longer for a tender interior. For stuffed crust, stretch thin, add cheese around edge, fold and seal; watch sealing to prevent leaks. Choose based on topping weight and desired bite.
- Thin: crisp, urgent satisfaction
- Thick: comforting, chewy warmth
- Stuffed: indulgent, gooey surprise
- Pan: golden, sturdy base
- Flatbread: light, flexible canvas
Adjust oven temp and bake time modestly to match chosen style. Test one small pie before baking full-sized pizzas.
Troubleshooting Common Issues and Pro Tips
You picked a crust style, now you’ll want quick fixes and practical tips when things go wrong: if your dough’s too sticky, chill it briefly and dust sparingly with flour rather than overworking it; if it tears, let it rest under a damp towel for 10–15 minutes to relax the gluten before stretching again; if your crust browns too fast while the center stays raw, lower the rack or reduce oven temperature slightly and bake longer; for soggy middles, par‑bake the base or use a thinner sauce and higher heat; and always weigh ingredients and give the dough a short bench rest after mixing for more consistent results. Trim wet toppings, preheat a baking steel or stone, then slice immediately to always preserve texture.
Conclusion
You’ve got a fast, reliable no‑yeast crust that performs every time. Use equal weights of self‑rising flour and Greek yogurt, add salt and a tablespoon of oil for flavor and stretch, knead briefly, rest ten minutes, then shape and top lightly. Preheat a stone or cast iron to 475–500°F and bake until golden. Adjust with teaspoons of flour or water as needed. With these steps you’ll consistently get a crisp, tender pizza every single time.