First, you’ll explore what makes Detroit-style pan pizza dough unique. Next, you’ll see how hydration and olive oil in the pan form that thick, airy crumb and crispy edges. We’ll walk through mixing, resting, and folding, then shaping a square that keeps pockets of air. Then comes topping and a mid‑bake rotation for even browning. If you want a dependable crust, you’ll want to try this, and there’s more to tell…
What Makes Detroit-Style Pan Pizza Dough Unique
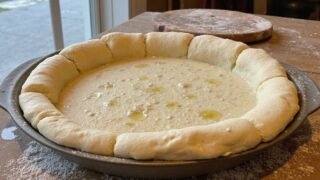
So, what makes Detroit-style pan pizza dough unique? You notice a bold history shaping every bite, and you feel invited to participate. The dough carries historical origins that mix Italian and American practicalities, plus a stubborn, cheerful confidence. You learn the pan matters as much as the blend, because pan materials influence the crust’s color, texture, and edge chew. You’ll choose a sturdy, heavy pan, imagine a fryer’s pace, and you’ll press the dough to every corner. This method favors spacious gaps for bubbles, which fans love. You keep it simple: mix, rise, rest, bake, enjoy, and adapt. If this feels like a story, that’s the point, guiding you toward delicious, reliable results. With practice, you’ll sense progress and savor every confident bite tonight.
Hydration and Dough Ratio Deep Dive
Why does hydration matter so much in Detroit-style dough?
You’ll see that water lets the flour relax and spread, creating that soft inner crumb, while still forming a sturdy edge enough to hold all the toppings.
That balance shows up as a steady dough ratio.
If your hydration level climbs too high, the dough feels loose, sticky, and hard to handle, so you learn patience while kneading, folding, and measuring to keep it controlled.
Keep notes on how it behaves from batch to batch.
That’s your hydration level guide, telling you when to add more water or flour to maintain a reliable dough ratio you can repeat each time at home.
Stick to a plan, laugh at mistakes, and adjust thoughtfully, my friend together.
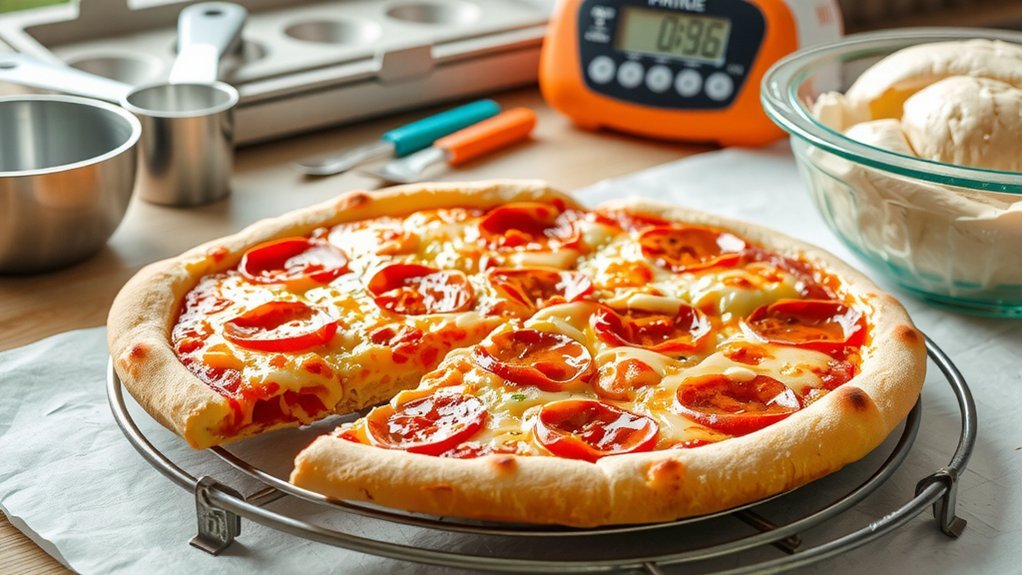
The Importance of Olive Oil in the Pan
How does olive oil in the pan change your Detroit-style crust, you may wonder. Oil creates a glossy edge, so the crust fries to a crisp without sticking, and you feel confident in flips, watching the pan slickness do heavy lifting. The aroma is welcoming, a hint of olive that says dinner is close. But it isn’t magic; you control it by the amount you pour and when you swirl the pan, so the oil aroma stays balanced inside. This habit prevents sticking and guides even browning. If you rush, the crust loses its bite, and the pan slickness fades, so take a moment to tilt and listen to the sizzling sound. Together, these tiny choices shape a resilient, flavorful base you’ll brag about.
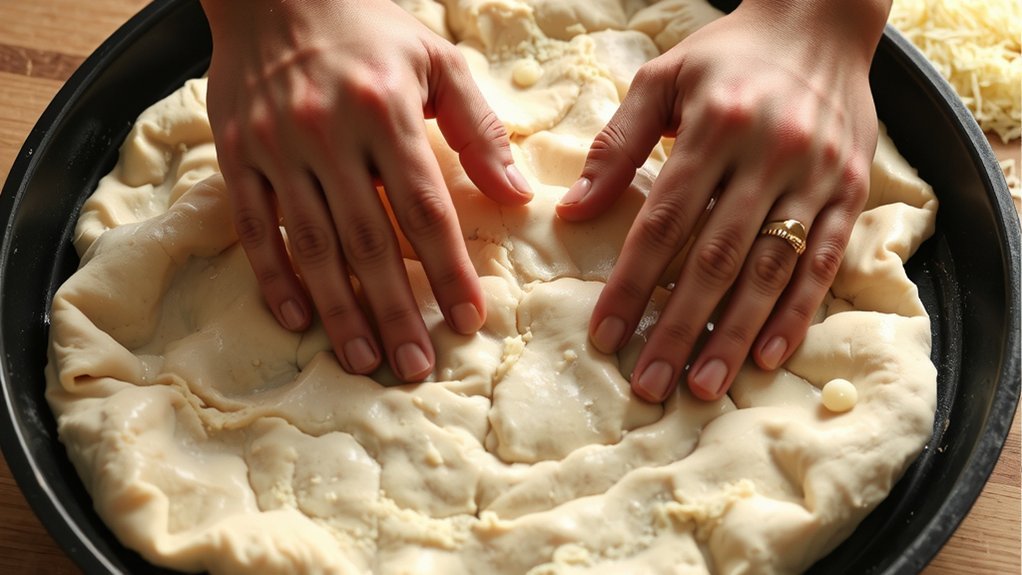
Step-By-Step: Mixing, Resting, and Folding
First, you gather flour, water, yeast, salt, and a touch of oil, then get ready to mix. You mix until ingredients just come together nicely. Next, you follow the mixing sequence, allowing the dough to hydrate evenly while you watch for slight cohesion. If it feels sticky, you wait a moment; patience helps here. Rest the dough, covered, for warmth. Then, you test the folding technique by turning and folding the dough once or twice, feeling how it tightens without tearing. This builds gluten and keeps air pockets intact. You respect the dough’s slow pace. Finally, you note the dough’s surface feel and set a time reminder, so you stay consistent. With steady rhythm, this step becomes automatic, preparing you to move forward confidently.
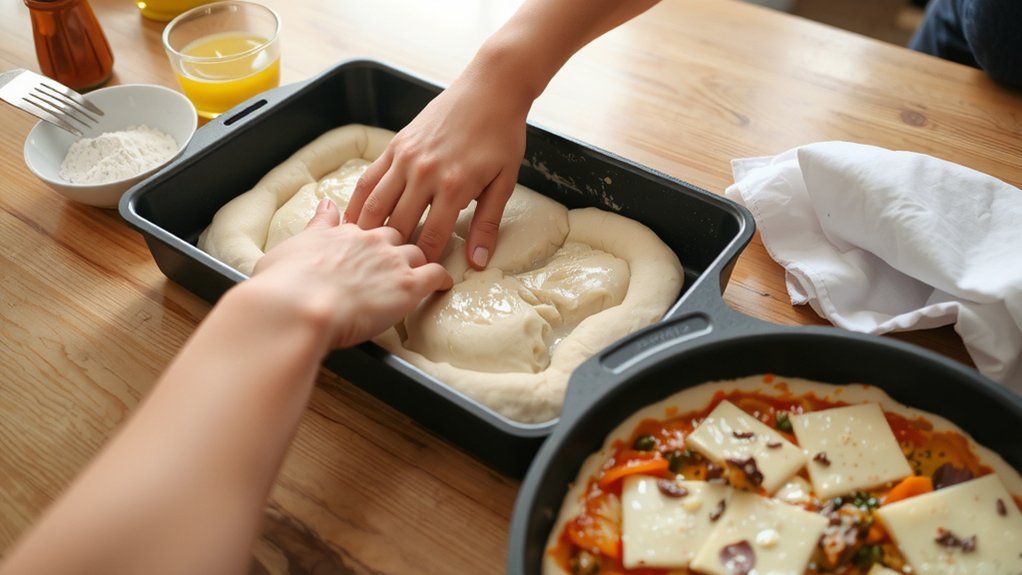
Shaping and Proofing for a Square Slice
Even though you just rested the dough, shaping a square slice is the next move. First, pick a shaping technique that keeps air pockets intact, then press evenly toward edges so the dough forms a square that fits your pan and crusty edges. Next, rotate the dough in the pan and note the proofing timing, letting it rise until it just feels airy, not collapsed, before bake-ready brightness. If it resists spreading, don’t force it. Lightly coax toward each corner, then let it rest another short stretch, keeping the surface slightly tacky to hold shape steady. Finally, verify the edges are even and the center has a bounce; that confirmation signals you’re aligned with dough’s goal, and you’re closer to a perfect square slice.
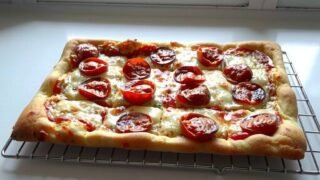
Topping and Assembling the Bake
First, let’s talk about how you layer the cheese evenly. Next, we’ll cover edge coverage techniques so every corner gets that crisp, caramelized edge, and I’ll share a simple bake-ready assembly step to keep toppings in place. If I’m clumsy, I’ll blame the cheese, not the recipe, and we’ll keep things tidy as we go.
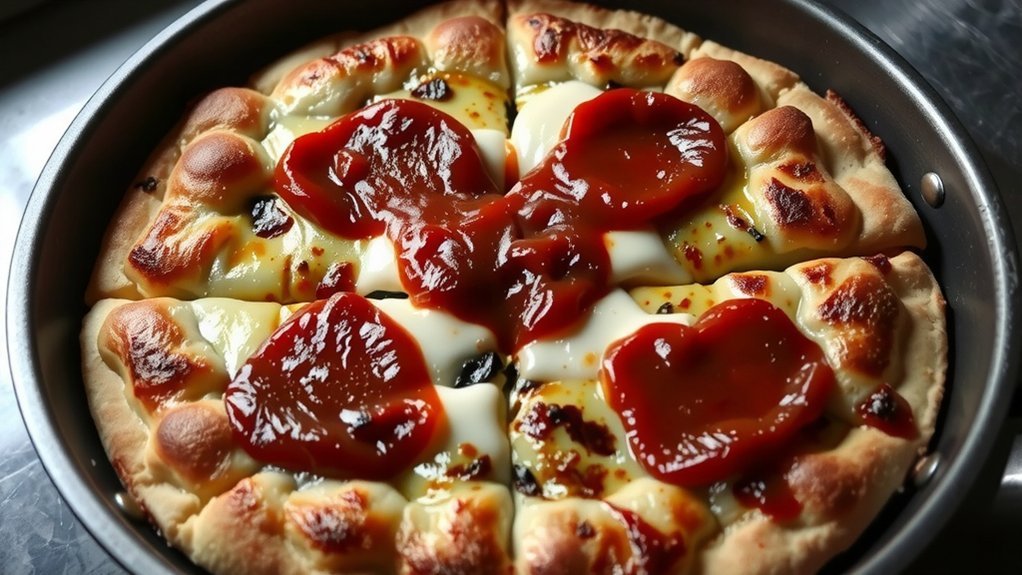
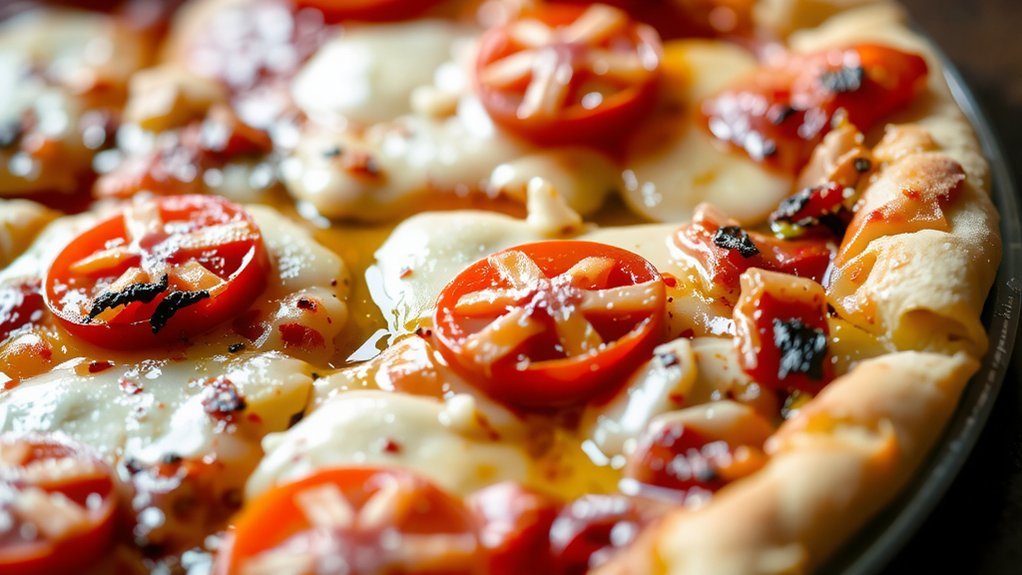
Even Cheese Layering
Layering the cheese evenly across the dough helps every bite stay balanced. When you sprinkle the cheese, aim for uniform distribution across the pan, not clumps in corners, so every slice carries a share of melt and flavor. Cheese layering helps, but keep balance. If you notice thick spots, shift cheese with your spatula, then taper toward the edges so the middle isn’t drowning while the sides get bite and crunch too. Signpost: now we talk layering ideas. Use a light second layer if you like extra cheese, but avoid overdoing it, or crusts stay soggy instead of crisp on the pan during baking. This is the step where confidence grows, and you trust the cheese to carry every bite smoothly as you bake.
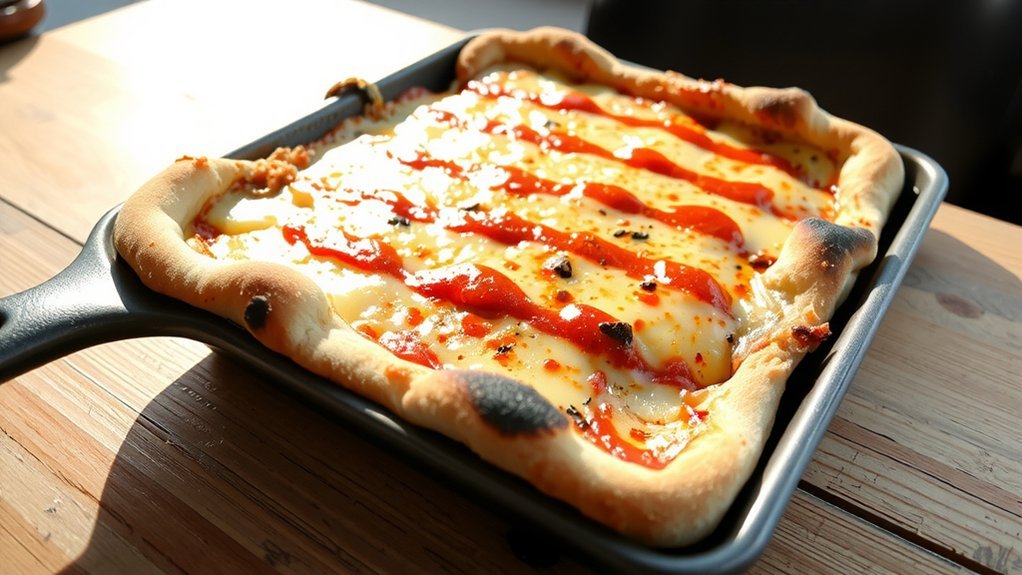
Edge Coverage Technique
Now that the cheese sits where it should, you’ll switch gears to edge coverage and how to finish the pan so every bite bites back with flavor.
You’ll start by a light pan greasing so the crust lifts without sticking, then guide cheese toward the edges with a calm hand and steady motion.
This is edge weaving, a simple rhythm where you push dough and cheese into a neat border that stays crisp.
Signpost: next you balance spacing and topping placement before the bake, so nothing slips and you feel confident.
If you spot gaps, bridge them with small folds, not extra dough, and keep edge weaving steady with even tension; the result is a sturdy ring of cheese and crust around every slice.
Bake-Ready Assembly Steps
A light oil helps the pan release and keeps toppings from sticking. You’ll spread the dough a bit, then drizzle a little more oil to invite toppings to settle. Now, line up the cheese, pepperoni, and veggies in neat rows, not a hodgepodge. This is bake-ready assembly, so think steady and calm, not rush. It feels doable when you keep it simple.
Next, you check assembly timing and balance. Sprinkle crust seasoning along the edges to help color, then dot the center with sauce sparingly. Keep a light hand, and resist overloading. You’ll rotate the pan halfway through so edges stay crispy. If you shrug at mistakes, laugh softly and try again, because this is how beginners learn—and pizza wins. You’ve got this, friend.
Troubleshooting and Tips for Perfect Crust
First, check hydration and dough temperature to keep the crust tender and easy to handle. Next, we’ll talk about oven heat management and how to preheat, bake, and rotate the pan so every corner cooks evenly, and your edges stay crisp. Then, we’ll cover pan oil distribution and tiny tweaks you can try, with a wink at my own kitchen mishaps.
Hydration and Dough Temperature
You want a dough that stays friendly to your timeline. To nail hydration metrics, you monitor how wet or dry the dough feels, adjust flour or water, and note the dough temperature as you mix. Next, pace your additions. If it sticks in the bowl, rest, then fold; if it tears, breathe, add tiny amounts of water, and watch the dough temperature settle gently. Hear the signs. In practice, you aim a flexible, soft ball that holds shape, and you log times between folds to keep dough temperature predictable during proof sessions. Signposts help you shift focus today. Now you apply this knowledge to your recipe, adjust hydration with confidence, and celebrate a crust that stays crisp at edges without rushing or overproofing.
Oven Heat Management
Dial in your oven temperature early to help the crust set without burning the edges.
First, do a preheat calibration by testing with a simple thermometer and adjust your dial so the actual heat matches the display, not just what you hope.
Next, account for thermal lag.
When you slide in the pan, remember the oven stays hot after you open the door, so you might need a minute or two more time for the crust to finish.
Watch edges without rushing.
Signpost the shift by noting crust color and air feel, then adjust future rounds, keep the conversation with yourself honest, and stay hopeful that steady temp control brings crisp, cheesy edges you’re proud to share with friends. During every bake session together.
Pan Oil Distribution
An even oil coat helps the crust turn golden. Now you focus on how the oil sits in the pan. First, spread a thin, even layer across the bottom.
In the next step, remember oil depth matters; too little and the crust dries, too much and it feels greasy, so aim a consistent film.
If possible, warm the oil slightly and test the temperature.
Then swirl the pan to coat every corner, and signpost: moving on to timing and technique, because even small gaps let hot spots ruin your crust’s crisp edges.
You want steady heat, not a sprint.
Check edges as they brown, stay calm, and learn from each bake; practice helps you adjust oil depth and oil temperature confidently over time, friend.
Conclusion
You’ve built something cozy and bold, a crust that rouses appetite today.
As it bakes, you see edges caramelize like sunlit cheese, you hear the pan sigh with steam, and you trust the dough to stay airy inside.
Keep your eye on timing, rotate, breathe, and let the square prove.
When you pull it free, savor the crackle, the cheese rim, and the soft crumb beneath, because practice makes confident, delicious Detroit-style magic for you.