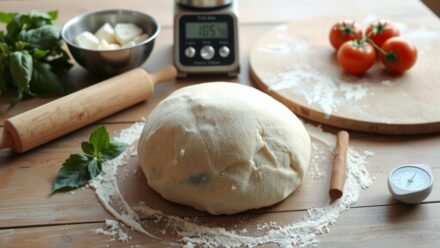
You can freeze pizza dough to extend shelf life and simplify scheduling, but success hinges on timing, fermentation stage, hydration, chilling, and packaging. You’ll learn exact temperatures, portioning, thawing, and baking adjustments to preserve texture and flavor…
Benefits of Freezing Pizza Dough
Preserving pizza dough by freezing extends its usable life and gives you precise control over fermentation, storage, and portioning. You’ll reduce waste and stabilize scheduling: frozen dough arrests yeast activity, halting fermentation until you deliberately thaw and activate it. You’ll gain predictable maturation windows, letting you standardize proof times and final dough temperature. Freezing enables portion control and inventory accuracy, so you’ll batch-prepare uniform balls and thaw only needed quantities. You’ll preserve dough hydration and gluten structure when you follow proper sealing and pre-chill protocols, minimizing freezer burn and ice crystallization. Operationally, you’ll improve throughput, reduce last-minute mixing, and maintain product consistency across shifts. Overall, freezing delivers temporal flexibility, inventory efficiency, and process reproducibility. You’ll also lower costs and simplify scheduling for consistent output.
Which Dough Recipes Freeze Best
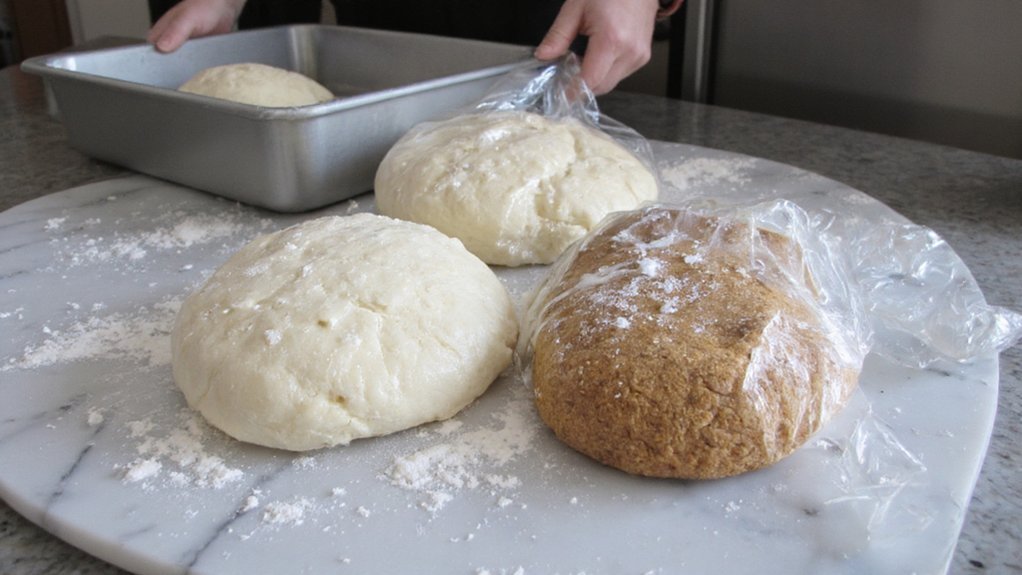
You’ll find that lean, high-yeast doughs—formulas with minimal fat and sugar and active commercial yeast—freeze and recover predictably after thawing. Sourdough and levain-based doughs freeze well too, but their long fermentation and wild-yeast ecology demand controlled retardation and shorter frozen storage to preserve flavor and leavening. You’ll adjust proofing and thaw protocols based on commercial yeast versus starter to maintain consistent oven spring.
Lean High-Yeast Doughs
When doughs are lean (minimal fat and sugar) and formulated with relatively high yeast, they tend to tolerate freezing better than enriched breads because there’s less solute-mediated yeast inhibition and the gluten network remains more resilient to ice-crystal damage. You’ll find these doughs recover activity after thawing with predictable fermentation kinetics, assuming proper handling. Freeze at bulk or ball stage to limit ice exposure per unit of dough. Prefer rapid freezing and storage at -18°C or colder. Thaw slowly in the refrigerator, then proof at controlled temperature and humidity control.
- High hydration lean doughs keep extensibility after thaw.
- Higher yeast percentage offsets viability loss.
- Short cold retardation pre-freeze reduces gas loss.
- Use airtight packaging to prevent freezer burn.
- Weigh portions for consistent thaw and bake.
Sourdough and Levain
How well a sourdough or levain survives freezing depends primarily on starter type, inoculation level, and dough hydration. You’ll preserve dough best when you standardize variables: use a mature, active starter with stable pH and low acidity; inoculate conservatively (0.5–2% preferment by flour weight) to limit CO2 loss during freezing; and keep hydration moderate (60–65% for tight crumb, 65–72% if you accept softer handling). Cold-proof dough to near halting fermentation, then portion, stretch- and-fold to equalize gas, and freeze quickly at -18°C or colder. Thaw in the refrigerator 12–24 hours, then rest at room temperature until puffy. Expect slight sourness reduction and minor gluten loosening; compensate with a brief cold retard after thaw if needed. Label date and starter percentage for reproducible results consistently.
When to Freeze: Timing and Dough Maturity

You can freeze dough at three distinct maturity points to control fermentation, gluten development, and flavor. If you freeze before the first rise, you’ll halt yeast activity for a neutral baseline; if you freeze after the bulk rise, you’ll lock in partial fermentation and a stronger gluten structure. Freezing during cold fermentation will substantially slow yeast while preserving developed flavor compounds, so you’ll resume with advanced maturation after thawing.
Freeze Before First Rise
If you plan to freeze dough before its first rise, do so after mixing and kneading once the dough has achieved cohesive gluten structure but before significant fermentation begins—typically within 30–60 minutes of finishing the knead. Freeze at this stage to pause yeast activity and preserve predictable fermentation behavior on thawing. Portion, oil, and wrap tightly to prevent freezer burn and moisture loss. Label with date and dough formula. Thawing and final proofing schedule depends on yeast amount and temperature; plan accordingly.
- Divide into individual balls (200–300 g)
- Lightly oil surfaces to prevent sticking
- Wrap in plastic, then foil or vacuum seal
- Freeze flat for efficient stacking
- Record yeast percentage and date
When ready, thaw slowly in refrigerator until dough becomes pliable and relaxed.
Freeze After Bulk Rise
Freezing dough after bulk fermentation requires timing the freeze to halt activity when the dough has developed strength and moderate gas retention but before it becomes overproofed and fragile. You should assess dough windowpane, elasticity, and volume increase: target roughly 1.5–2× original volume depending on recipe. Degas minimally to preserve structure, portion, then wrap tightly to prevent freezer burn and moisture loss. Rapid cooling reduces ice-crystal damage; place dough in the coldest part of the freezer and avoid temperature fluctuations. Label with date and fermentation parameters (hydration, yeast percentage, ambient temp) to reproduce results. When thawing, allow a controlled warm bench proof to reactivate yeast but monitor for overexpansion. Freezing at this maturity yields predictable oven spring and consistent crumb if handled precisely only.
Freeze During Cold Fermentation
When dough is undergoing cold fermentation, aim to freeze it once it has developed structure and flavor but before enzymes and acid start degrading gluten — typically after the dough has rested in the refrigerator long enough to show good extensibility and a modest volume increase, often in the 12–72 hour window depending on hydration and yeast level. You’ll arrest fermentation at that maturity to preserve crumb. Follow procedures before freezing:
- Pre-shape into desired ball sizes to limit handling after thaw.
- Lightly oil and wrap tightly to prevent freezer burn.
- Quick chill to near 0°C before long-term storage.
- Label with date and dough formulation.
- Expect slight loss of rise speed; plan longer proof after thaw.
Thaw slowly in refrigerator and finish proofing before baking.
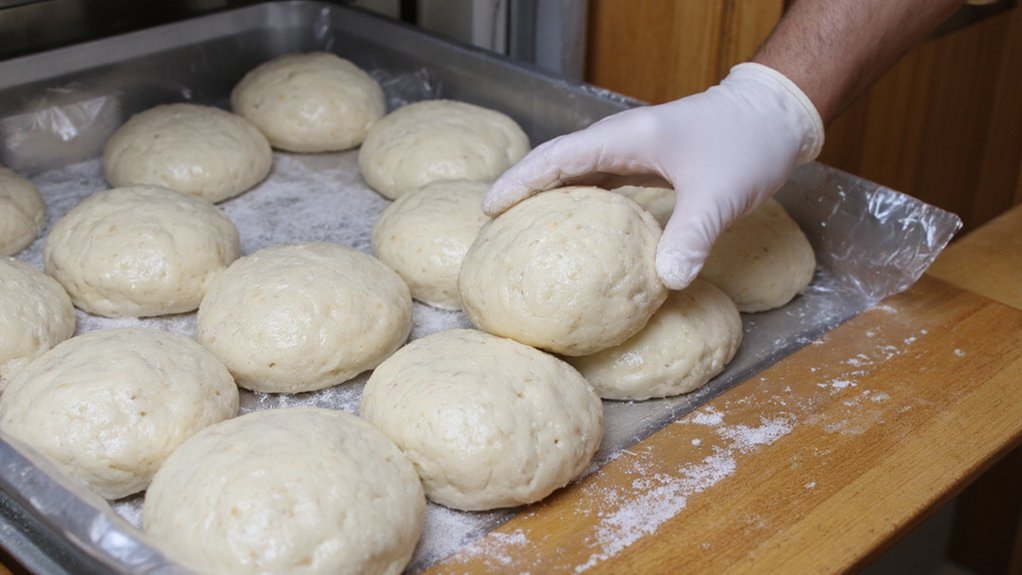
Portioning and Shaping Before Freezing
Although dough will relax during freezing and thawing, you should portion and shape it precisely to control final crust thickness and proof time. Weigh each ball to target mass (for example, 250 to 300 g for personal pies); record variance to maintain consistency. Divide using a bench scraper on a lightly floured surface, perform pre-shape rounds, then tighten by cupping and rotating to create surface tension. Rest 10 to 15 minutes for gluten to relax before final shaping into smooth spheres. For thin crusts, flatten slightly to reduce later proofing; for thicker crusts, retain more height. Label each portion with weight, date, and intended bake size. Freeze portions on a tray until firm to preserve shape, then proceed to storage. Thaw method affects timing.
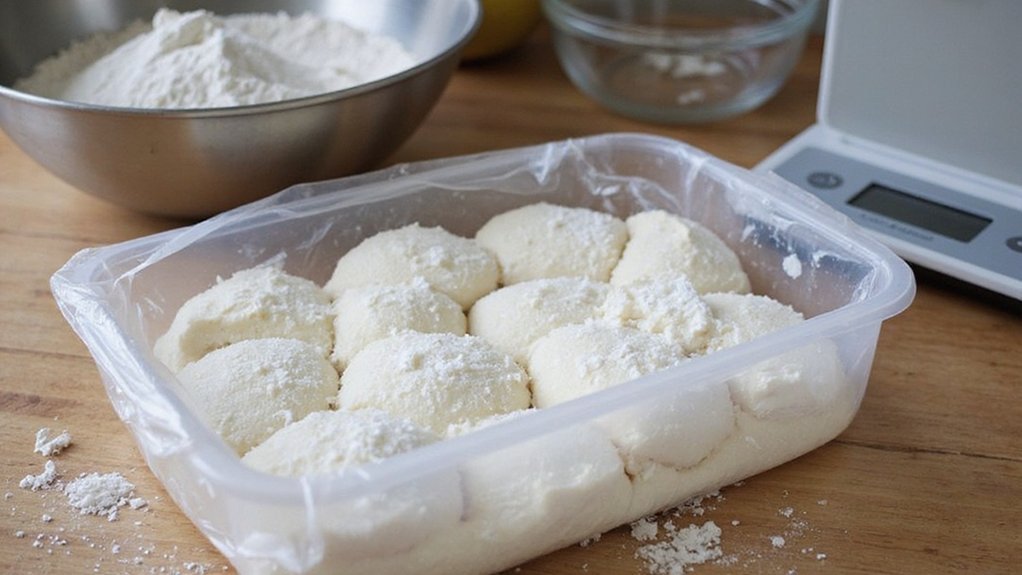
Best Wrapping and Container Options
Choose packaging that provides an airtight, puncture-resistant barrier and lets the dough expand slightly without tearing. You’ll select materials that control moisture, prevent freezer burn, and withstand stacking. Use a two-stage approach: wrap dough tightly, then place in a rigid container or heavy-duty bag with headspace for gas expansion. Label containers with date and weight.
- Heavy-duty freezer bags (2–3 mil) with excess removed
- Double-wrap: plastic wrap then aluminum foil for barrier redundancy
- Rigid plastic or glass containers with secure lids and ½” headspace
- Vacuum-seal pouches when available for maximum air removal
- Silicone storage boxes that resist cracking at low temperature
Follow these steps to maintain dough integrity and predictable thawing. Store single layers to avoid deformation and simplify thawing process.
Quick-Freeze vs. Slow-Freeze Methods
After selecting proper packaging and headspace, you must weigh the benefits of quick-freeze versus slow-freeze methods for dough preservation. Quick-freeze minimizes ice-crystal growth by rapidly lowering temperature through -30°C to -40°C range; you’ll preserve gas cell structure, reduce cell wall rupture, and maintain dough extensibility. Use high-airflow, low-temperature freezers or blast freezers and avoid stacking pieces. Slow-freeze exposes dough to gradual crystallization near 0°C to -10°C; larger crystals form, increasing gluten network damage and moisture migration, which can reduce spring and lead to textural change. Slow-freeze suits short-term storage when equipment is limited and when you can control rise prior to freezing. Monitor core temperature with a probe and document time-to-target to guarantee consistent outcomes across batches. Label samples with date, weight and yeast.
Thawing and Final Proofing Techniques
When you thaw and proof frozen dough, control temperature, humidity and timing to reactivate yeast without overproofing or causing surface collapse. You’ll thaw dough slowly in the refrigerator for 12–24 hours or use a controlled room-temperature phase for 1–3 hours to bring dough to workable temperature. Handle gently to preserve gas and gluten structure; degassing should be minimal. Final proof occurs after shaping: monitor rise, perform poke test, and maintain 24–27°C with 75% relative humidity when possible. Use the following routine to standardize results:
- Refrigerated thaw: 12–24 hours, covered.
- Room-temperature finish: 1–3 hours, monitored.
- Shaping: minimal handling, gentle tension.
- Poke test: quick springback indicates readiness.
- Proof chamber: 24–27°C, 75% RH for final proof.
Bake promptly when tests indicate ideal proof. Then transfer to oven.
How Long Frozen Dough Keeps and Signs of Spoilage
Typically, frozen pizza dough keeps peak quality for about 1–3 months in a stable -18°C (0°F) freezer, and it’ll remain safe to use for up to 6 months though texture and leavening power will decline. You should label date and batch; older dough shows measurable changes. Expect gradual gluten weakening, reduced oven spring, and drier crumb after three months. Use sensory and simple mechanical checks: smell for off-odors, inspect for visible discoloration or ice crystals, and test elasticity when thawed.
| Indicator | Interpretation |
|---|---|
| Off or sour odor | Spoilage — discard |
| Discoloration (gray/green) | Mold risk — discard |
| Excessive ice crystals | Partial freezer damage |
| Loss of elasticity | Reduced performance, may still be usable |
Follow discard criteria strictly for safety. When unsure, always err on the side of food safety.
Tips to Prevent Freezer Burn and Over-Proofing
You’ll double-wrap and vacuum-seal dough to block air and moisture migration and minimize freezer burn. Flash-freeze individual portions on a tray until firm so pieces keep their shape and won’t fuse in long-term storage. Chill dough to near refrigeration temperature before freezing to slow yeast activity and prevent over-proofing while frozen.
Double-Wrap and Seal
Wrapping dough twice and sealing every seam prevents moisture loss and limits gas exchange that causes freezer burn and over-proofing. You’ll wrap each dough ball in plastic wrap, then wrap again with a tightly fitting layer to create redundant barriers. Use an airtight, heavy-duty freezer bag and expel air before sealing. Label with date and dough weight for inventory control. When sealing, press seams and corners to prevent pockets.
- Use cling film first to conform to surface.
- Add a second plastic layer with overlapping seals.
- Insert into a low-permeability freezer bag.
- Squeeze out air and apply a zip closure.
- Remove excess bag material and guarantee flat seams.
You should freeze within 24 hours of wrapping to minimize gluten relaxation and yeast activity during storage.
Flash-Freeze Before Storing
Placing wrapped dough balls on a rigid, well-spaced tray and fast-freezing them at -18°C (0°F) or colder for 1–2 hours locks shape and halts yeast activity, preventing freezer burn and over-proofing. You should arrange dough with at least 2–3 cm clearance to promote uniform air circulation and rapid thermal conduction. Use rigid trays and avoid stacking; thin-gauge film or parchment minimizes insulation. Set your freezer to maintain target temperature and monitor with a probe thermometer. After the flash-freeze interval, transfer dough to airtight, labeled containers and remove excess air to prevent sublimation. Limit handling time to retain crust integrity. If you follow these controlled steps, you’ll preserve cell structure and dough performance for longer-term storage without ice crystal damage. Check seals periodically during storage.
Chill to Slow Proofing
If you chill dough to 2–4°C (35–39°F) for 1–4 hours before freezing, you’ll slow yeast metabolism and firm the gluten network so the dough resists over-proofing and ice-crystal formation during storage.
You’ll also reduce surface moisture and stabilize gas cells, improving freeze tolerance. Work methodically: degas gently, shape tight balls, wrap twice with plastic film, and cool on a tray to avoid condensation. Label with date and expected shelf life.
- degas gently to equalize gas cells
- shape tight, uniform portions to minimize exposed surface
- wrap airtight with plastic film and secondary bag
- cool on a tray to avoid condensation before sealing
- label with date and intended proofing time
Then freeze promptly. When thawing, thaw slowly in the refrigerator to rehydrate and resume controlled fermentation.
Baking Frozen Dough: Temperature and Handling Tricks
When you bake frozen pizza dough, treat temperature and handling as controlled variables: preheat the oven (and stone or steel) to 250–290°C (480–550°F) so the surface hits the dough immediately, slide the frozen disc onto a parchment-backed peel or preheated pan to avoid thermal shock, and expect 25–35% longer bake time than for room-temperature dough. Let the center temper briefly if topping cold ingredients; 5–10 minutes at ambient reduces thermal gradient without significant overproof. Use a calibrated infrared thermometer to verify surface temperature before launch. Rotate the pizza once midbake for even coloration. If the crust browns too fast, lower top heat or employ a tented foil for targeted shielding. Record time, temperature, and adjustments to refine repeatability. Document results after each session for consistency.
Conclusion
You can freeze pizza dough to extend shelf life and streamline prep; you’re reducing waste. After mixing and chilling to 2–4°C, portion and flash‑freeze on a tray, then vacuum‑seal or double‑wrap in airtight bags. Store at −18°C; use within 1–3 months for best quality. Thaw refrigerated 12–24 hours, then proof at room temperature until risen before baking. Discard dough with off‑odors, mold, or severe freezer burn. Label pouches with date and hydration percentage for rotation.