Crisp crust, soft dough—you want both, and that starts with a plan. First, you’re preheating a heavy sheet pan and stretch the high-hydration dough onto it, guiding it slowly so it glides rather than tears. Then you top it with bold ingredients that stay crisp under cheese, and you know this. Next you bake at high heat until blistered edges crackle, slice edge to edge, wipe the blade, and you learn that patience makes every bite worth it.
Dough Basics for Sheet Pan Roman Pizza
Let’s start with the basics of dough for sheet pan Roman pizza. You mix flour and water and you’re trying to coax flavor without overthinking it. You’ll notice yeast behavior shows up as bubbles in the bowl and a softer feel in your hands. Flour hydration matters, because wetter dough can stretch better during pan spreading, while drier dough stays firm and easier to handle. Keep it simple: measure; mix; rest; shape. The goal here is a forgiving dough that shines with time and heat, not a chemistry lab. If your dough sticks, flour your hands gently and move on. Remember, practice builds confidence, and your sheet pan pizza will improve with each bake. You’ll notice the texture changes as it rests, too, tonight.
Tools and Ingredients You’Ll Want on Hand

First, gather the basics you’ll keep handy when you bake a sheet pan Roman pizza.
These tools make prep feel simple.
Keep your pan essentials ready, like a sturdy sheet pan, a wide spatula, and a clean kitchen towel, so you can move dough and toppings with calm confidence.
Next, plan the pantry.
Your spice cabinet should hold salt, pepper, dried oregano, garlic powder, and red pepper flakes, plus a tiny bottle of olive oil for finishing a glossy crust.
Also, check the readiness of measuring cups.
Finally, label a small space for tools you’ll grab quickly, and keep a baking sheet nearby; the next topic moves you toward practical baking success every day.
Keep these tips in mind as you bake, and enjoy.
Creating a Forgiving, Stretchable Dough
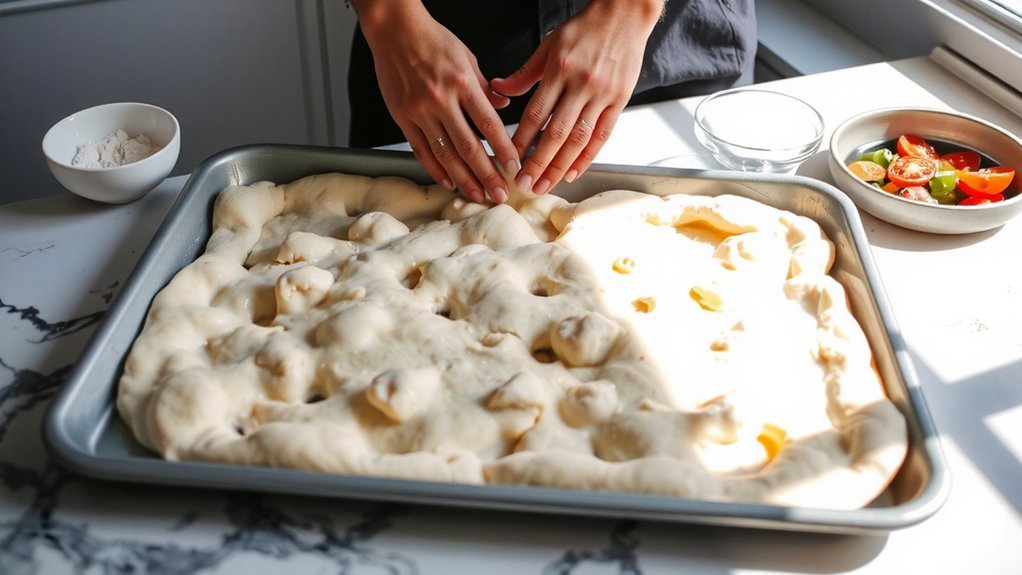
First, you’ll see how hydration and gluten development shape the dough’s strength. Next, we’ll talk about oil’s role in tenderness, give the dough time to rest so it relaxes, and how to extend it without tearing for airy slices. Finally, you’ll feel more confident shaping the dough, even when it sticks a bit, because you’re practicing, not perfect.
Hydration and Gluten Development
Even if you’re new to bread, hydration sets the tone for a forgiving dough. You’ll notice how water changes the dough’s feel. When you control hydration levels, you improve the gluten structure, so dough stretches without tearing, making sheets easier to bake evenly on a busy weeknight. If it feels stiff, rest a minute and give it more water. Or if it’s loose, fold in a little flour and watch the dough settle into a kinder grip before you sheet it. This balance makes the pan bake more evenly and helps you stay confident. Remember to keep keywords in mind as you work, hydration levels guiding feel and gluten structure shaping the dough you’ll proudly bake. Stay patient; practice grows softness and confidence daily.
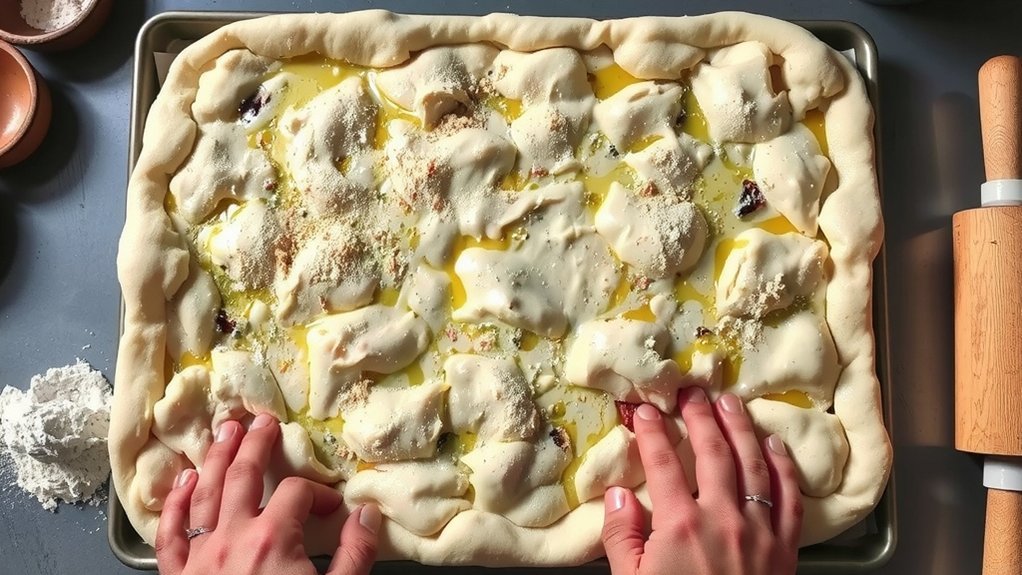
Oil, Rest, Extend Dough
Pour a little oil into the dough and feel how it coats the grains, for your hands today. We begin with olive oil on your hands, then let the dough rest while you plan your sheet-pan setup and hydration goals today for good measure. This is about ease, not strain or rush, and you’ll barely notice the clock. If it tears, you simply smooth it, wait, and stretch again, because dough rest teaches you patience while you learn control in busy kitchens. Keep it calm, and you’ll feel flexibility grow with each tiny stretch you manage. This balance of olive oil, air, and time makes a forgiving dough you can extend across a pan without tearing, and you’ll smile at your own progress, honestly.
High-Heat Bake for a Crackly Crust
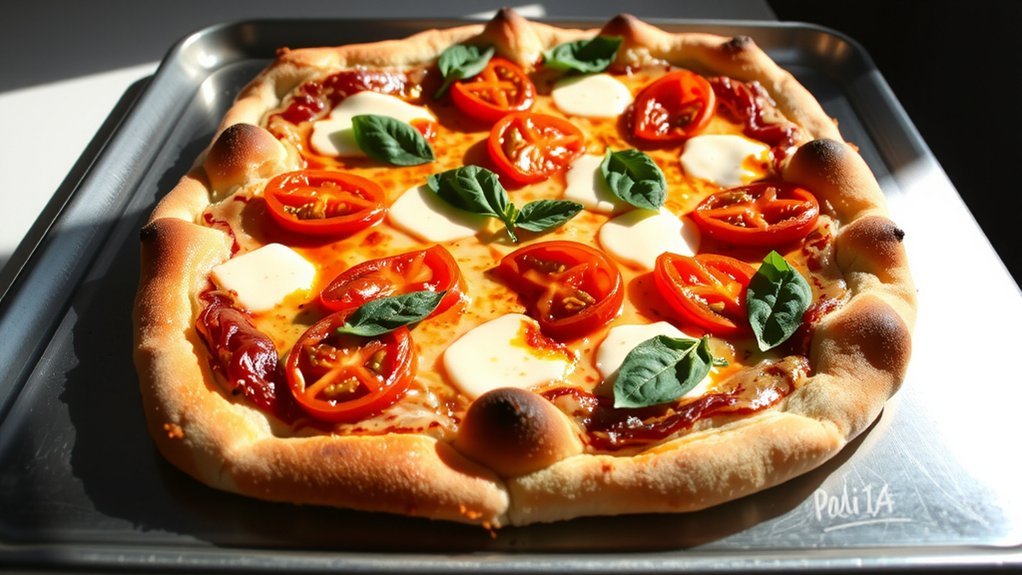
First, you’ll see why high heat helps you get a crackly crust. Next, I’ll show you simple tricks, like baking on a hot stone or steel and giving the dough space to puff, so the edges crisp without drying the toppings. But hey, I still burn toast sometimes, so you’ll know you’re not alone.
Why High Heat Works
When you bake at high heat, the crust sets fast and stays crackly. High heat focuses flavor and texture, not just color. You get quicker starch gelation and less soggy dough. This is where crust chemistry matters, because heat reshapes moisture and starch into a firm, delicious bite. You’ll notice a thin surface crust that resists steam and keeps crunch. Signpost: steam dynamics play a role, but not in the way you might expect. The oven’s heat moves water out fast, so the dough dries at the top while staying tender inside. Signpost: timing matters; pull the sheet at the moment the edges brown. If you laugh at yourself, you’ll bake better on your next try. Keep practicing, and trust the crackle will grow.
Crisp Crust Techniques
High heat makes a crackly crust.
First, preheat the oven with a heavy pan inside, so the steel sizzles when the dough lands, and you hear the turn-from-soft to blistered edges.
This is your crackled crust goal.
Keep the dough thin on the sheet, and resist lifting it too soon, because patience is flavor, and the air will push bubbles into structure.
You’ll spot blistered edges, a sign of work well done.
Next, shift the focus to timing, not just heat, and watch for crackled crust that’s even across the pan, with steam escaping and a crisp bite you trust.
Toppings That Stay Bold Under Cheese
How can you keep toppings bold under cheese without losing their flavor? First, choose toppings that resist softening, like roasted peppers, caramelized onions, or firm mushrooms, because crunchy bits stay noticeable and your topping boldness stays intact under melty layers. Signpost: moisture matters, so pat toppings dry before they meet cheese. Next, cut toppings into small, even pieces to control heat and preserve texture, so their flavors stay distinct while cheese melts smoothly for better topping boldness under cheese. Finally, bake hot and keep toppings toward the center to guard their shine. When you taste, you’ll notice the contrast, and that’s the goal, because good melty behavior invites curiosity without burying every bite under cheese in the slice. Stick with this approach, you’ll notice.
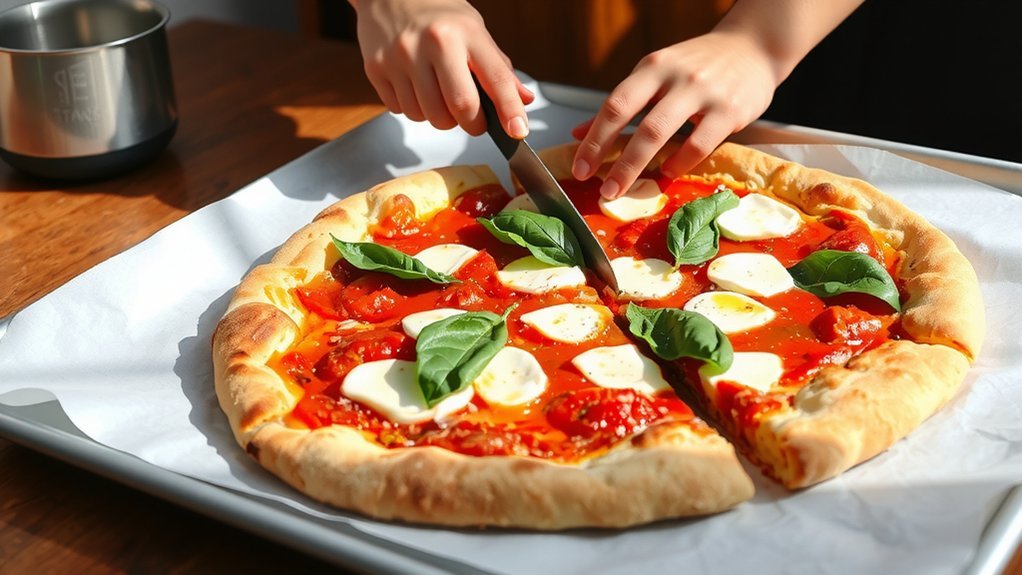
Portioning, Baking, and Slicing Like a Pro
You’ve kept toppings bold, and now you’ll learn to portion, bake, and slice like a pro. First, decide serving portions before you bake, so guests know what to expect and you stay organized. Next, bake evenly by rotating the sheet and watching the edges turn golden. You’ll hear a light crack when the crust is firm enough to lift. Then, practice slice precision by cutting from edge to edge in clean, straight lines. Use a pizza wheel or a sharp knife, and wipe it between cuts for neat portions. Finally, plate with care and note how thin wedges can be shared or saved for later. You’ve got this; practice builds confidence. Keep a calm pace, check temperature, and adjust next time for better results.
Customizing Height and Crunch to Your Liking
Why worry about height and crunch when you can tailor them to your taste?
You adjust as you bake.
This is height tuning in real life, and you get to feel the sheet pan work with you as you press, rest, and bake.
Let’s talk texture.
Crunch dynamics depend on dough thickness, oil amount, and how long you bake; small tweaks add up, making a crisper edge or a softer center.
Try different steam and bake times.
Keep notes so you can repeat the exact height tuning you loved, and label each sheet with the date and bake level for easy crunch dynamics recalls.
This helps you grow confident in your kitchen.
If it lands poorly, you’ll edit, not quit, and you’ll note what changed, then retry with a calmer pace and a wiser, more confident bite.
Conclusion
You’ve cracked the crust, now savor the craft.
Keep your eyes on the edge, wipe the blade clean, and ride the heat like a surfer; every blister is a medal, every slice a small celebration.
Trust patience; it makes the crispness linger.
As you plate, remember this is practice in motion, not perfection on day one; you’ll improvise, adjust height, crackle, and smile as the pan calms until the pan cools and you grin brightly.

