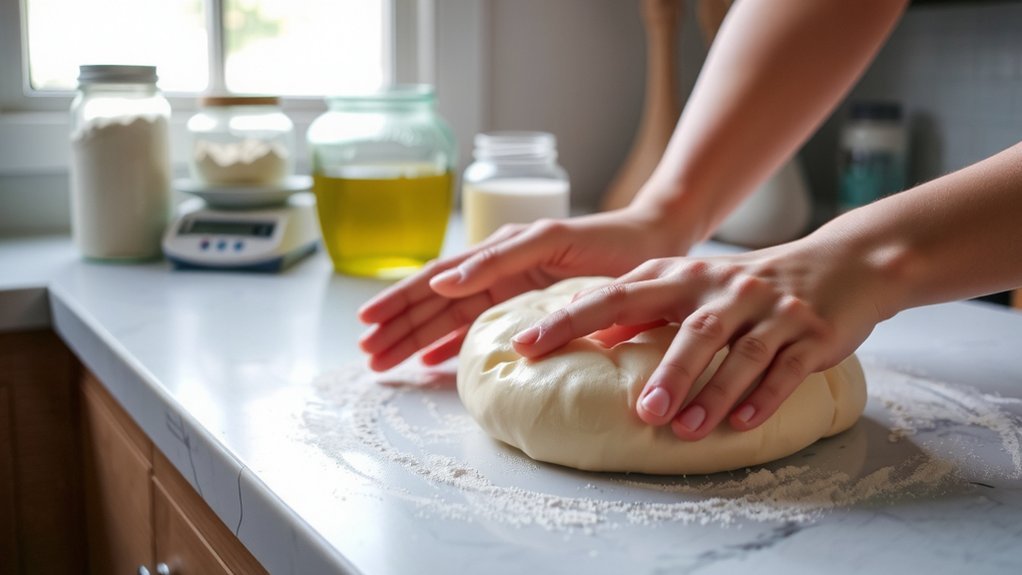
You can bake better pizza at home, you can push dough farther, you can coax flavor from simple ingredients. Now let’s start with dough, because the base matters, using pantry staples and slow fermentation. Then you’ll heat the oven like a pro. We’ll balance sauce and toppings, stretch with light hands, and watch for blistered edges, because the aim is an even bake and a crust you’re proud of.
Building a Restaurant-Worthy Dough From Pantry Staples
Honestly, can you turn everyday pantry staples into restaurant-quality dough?
First, you gather simple pantry substitutions like flour, water, salt, and oil.
Then you test yeast if you have it, or rely on natural leavening ideas, because yeast stewardship means respecting what your dough can do without fancy stuff.
You mix slowly, watch texture, and learn what works.
With patience, you adapt, noting how pantry substitutions change chew and flavor, and you log results so batches feel easier and closer to restaurant quality.
I’m not pretending perfect dough happens today.
Next, you set up a simple workflow for timing and rest, so you stay confident and bake without rushing.
Yeah, it takes practice, but your kitchen starts feeling like a tiny, friendly test kitchen.
Selecting Flour and Hydration for Chew and Structure

Choosing flour is choosing the backbone of your chew and crust, and your pick will set the pace for how confident you feel slicing into a hot, restaurant-like slice. Next, you aim for hydration levels that keep the dough supple yet strong, so it holds shape while baking and still stretches nicely when you pull a slice. Choose a flour category you can buy without drama. Also, practice gluten development through gentle mixing and rest, because time and rest help structure without overheating the dough, and you’ll notice smoother texture and taller crusts. Don’t overcomplicate it. Finally, signpost your choices by testing with small bakes, compare hydration levels, and remember that your goal is balance, not perfection, so stay curious and keep notes.
Mastering the Overnight Rise for Depth of Flavor

Why rush flavor when you can let it wake up overnight?
Let flavor wake overnight—patience slows fermentation, shaping rustic crusts you can trust.
Keep it slow.
During the calm overnight, your yeast activity slowly ferments, building depth, while the fridge temperature slows it just enough to develop flavor without sour notes.
Let rest.
Next, plan a second rise at room temp, so the dough loosens and breathes, and you can shape with confidence before the hot oven transforms it into crust.
Taste comes later.
If you keep notes, you’ll repeat the overnight timing for your oven and flour, and your crust will feel more rustic and confident next time.
Be patient.
Enjoy the deeper, richer slice tomorrow, knowing the overnight rise paid off and the aroma will greet you like a hug from the kitchen tonight.
Preheating Like a Pro: Heat, Stone, and Steel Basics
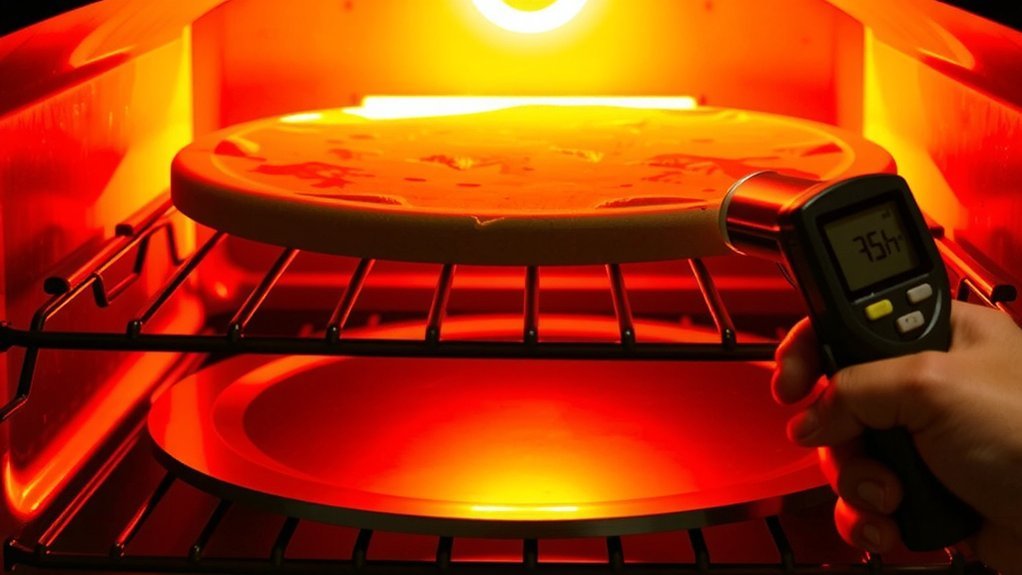
To get that hot, crisp crust, you start with preheating the oven properly. Set the rack where you want the pizza, then give the oven time to wake up for a true bake before you even think about sliding in dough. That time matters; neglect it and the crust stales before toppings shine. A steady preheat duration helps you avoid cold spots, and it makes stone placement predictable and reliable. Keep an eye on the oven light as a simple cue. If you use a stone or steel, let it heat alone for a bit. When you finally slide in the pizza, watch the edges puff and brown, and adjust your stone placement next time for even more leverage on for consistent results tonight.
Simulating High Heat With a Baking Stone or Steel

That brings us to simulating high heat with a baking stone or steel.
You heat the surface so the crust cooks fast and develops a crisp edge, much like a bakery oven you know well at home during weekend testing.
This relies on heat transfer from stone to dough.
Thermal mass helps you keep steady heat between batches, smoothing fluctuations and preventing sudden temperature drops as you slide new dough in and watch the crust set.
Thermal mass keeps heat steady between batches, smoothing fluctuations as you slide in new dough and watch the crust set.
Preheat longer, let the stone soak up energy today.
Slide the dough in gently, listen for sizzle, and watch browning signal progress as you tune positioning and timing with each bake until you feel confident.
If browning is uneven, adjust height or distance and smile at mistakes too.
Crafting a Blitzed, Fragrant Tomato Sauce
First, you boost blitzed tomato flavor by pulsing ripe cans in quick bursts. Next, you add fragrant herb boosts—basil, oregano, and a whisper of garlic—so the aroma blooms as the sauce simmers, giving you a cleaner, more layered scent without extra effort. And finally, I’ve burned water, but this sauce nails it.
Blitzed Tomato Flavor
If you want bright tomato flavor, blitzing tomatoes works. You pulse the tomatoes briefly, then taste and adjust with a pinch of salt, a drizzle of olive oil, and a whisper of sugar to lift the acid balance. This blitz adds brightness without overcooking. If you want texture contrast, leave some chunky bits and blend others smooth, so the sauce hugs cheese on hot crusts without losing the focus you need today. I joke that I overthink garlic, not this. Signpost: now you taste, tweak, and remember the basics, because you control brightness and body. Rely on the simple checklist: adjust salt, balance acidity, keep some texture, and let airiness through in a quick, confident splash. Trust your palate, you’ve got this, night awaits.
Fragrant Herb Boost
Blending in bright herbs can lift the sauce, and tonight we’re dialing in that fragrant boost. Skip plain tomatoes and blitz them with olive oil, garlic, salt, and pepper, then fold in fresh basil aroma and a whisper of thyme zest for depth you can taste. You’ll feel the difference in aroma.
This blitzed sauce stays bright and lively, so spread it early and cook the crust quickly, then taste again and tweak with salt or herbs if needed. Then adjust by smell, taste, and your gut; trust simple tweaks for better balance tonight too. If you’re unsure, pause, breathe, and let the sauce rest a minute before spreading; it helps you judge salt, brightness, and balance, so your pizza keeps that home‑oven magic.
Balancing Toppings for Even Bake and Crisp Edges
First, we focus on even topping distribution so every bite bakes consistently. Then we shift to crust edge crisping and moisture-aware toppings, showing you how a light sprinkle of grated cheese near the rim and avoiding puddles keeps edges crisp. If I slip up, it’s just a reminder to stay patient, because with practice you’ll nail the balance.
Even Topping Distribution
Toppings should be spread evenly across the dough. You want uniform layering, so each bite feels like the same pizza, not a cheese cliff next to a lone pepper. Start with a light hand. Distribute toppings in rings or grids, avoiding piles in the center, so heat reaches every layer and the crust edges stay calm rather than soggy. Next, avoid overloading. Practice topping balance by weight and color, placing greens after cheese and meats, and aiming for even coverage from edge to center, which truthfully helps bake evenly. Finally, practice routinely. Signpost your shifts clearly by saying, ‘Next, we balance with more greens,’ and you will feel confident, more precise, and a little prouder of your even-topped pizza. Keep practicing; you’ll notice progress.
Crust Edge Crisping
Now that toppings sit evenly, let’s turn to crust edge crisping. First stretch thin and let the dough ride on baking surface dusted with cornmeal dusting to prevent sticking and create a barrier that helps browning. Next, slide the dough onto a hot stone or steel, and give the edge space to crisp without warping the center. Throughout the bake, monitor steam release by propping the oven door or using a vent, because steam lifts crust without soggy spots. If edges brown faster than the center, tilt or rotate gently and rest the crust—a bake rather than a rushed flip. This is a small practice, but it adds crunch you can hear in every bite, and it keeps toppings from crowding the edges.
Moisture-Aware Toppings
Thinking ahead about moisture helps you bake a more even pie.
Toppings matter for crust color and sog-free bites.
Think water content. Fresh toppings shed juice, so pat them dry and choose ingredients with lower moisture when possible, or pre-drain mozzarella to reduce watery melt.
This is where drip prevention helps you. Layer denser components toward the center and lighter ones near the rim so steam escapes and the edges stay crisp.
Keep tomato sauces modest and let toppings finish cooking.
In short, balance moisture, practice, and learn your oven. With these tweaks, you’ll get even bake and crisp edges without turning your pie into a soggy mess. Practice with different toppings, note results, and celebrate small successes along the way in your kitchen.
Stretching and Shaping Dough Without Tearing
If you want a dough that stretches without tearing, give it a little rest before you start shaping it. Resting relaxes gluten just enough, so when you pick up the dough, it stretches instead of snapping, and you feel calmer. Next, you’ll use a palm technique to coax the dough outward, rotating as you go, avoiding quick grabs that pull strands. If you’re unsure, do a quick slap test on a piece first, then apply the same motion to the whole dough. Shift to shaping by letting the dough rest between passes, so it doesn’t stiffen, and keep the surface dry. With practice, you’ll hear a soft breath and smile at clean rims. Signpost: remember the palm technique and slap test, then breathe easy.
Achieving Blistered, Bubbly Crust With Proper Bake
Crackling, blistered edges don’t happen by luck; they come from heat, timing, and a little patience. To reach that blistered vibe, you’ll bake on a hot stone or steel and let the oven roar without hesitation, that first crack being your cue to watch steam management. Let the dough rest. Crust elasticity helps you stretch without tearing, so you glide edges smooth and avoid soggy centers. Keep your hands light, press gently, and feel how it moves. Next, observe the steam lifting bubbles before the crust browns. That moment is your cue to rotate the pizza, rotate again if needed, and keep steam management steady, not a blast of heat or scorching air. With practice, you’ll savor blistered, bubbly crust more often today.
Troubleshooting Common Pizza Pitfalls
Sometimes the pizza magic stalls, and that’s normal. You can still fix it, step by step, with calm focus and simple tweaks, because practice makes outcomes clearer over time. First, check your oven heat settings and bake position, since many problems start there and save you plenty of wasted pizza energy. Next, preheat longer than you expect and use a stone or steel if possible, because a hot surface matters as much as toppings. If the crust browns too fast, tilt the pan or lower the rack to slow that early color change. Watch for greasy crust and uneven bake, then adjust dough thickness and sauce amount accordingly. Finally, rest your dough and breathe; confidence improves flavors more than you realize.
Conclusion
Now you’ve got the map, trust your dough and your oven.
Each bite should feel bakery-fresh, with blistered edges and a subtle char; if not, tweak heat, stone time, or sauce balance.
Remember signposts: bake, rest, stretch, bake again.
Stay hopeful, learn from every pie, and jot notes for next time; you’re building flavor with patience, not shortcuts, and that quiet confidence beats any shortcut.
And when a slice sinks, laugh, tweak, then try again.