You want a thin, crisp New York crust that still has a tender, slightly chewy crumb. You’ll use high‑protein flour, controlled hydration, and a long, cool ferment. Mix just until cohesive, do gentle folds, and cold‑proof for flavor and structure. I’ll show the exact ratios, timings, and oven tricks that make the difference — and how to avoid common pitfalls.
Ingredients and Equipment
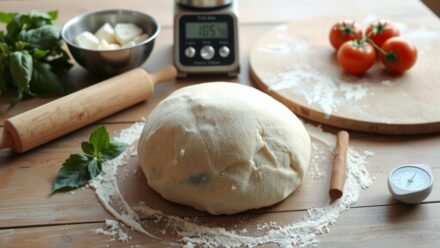
For a reliable New York–style crust you’ll need high-protein (bread) flour, water, salt, instant or active dry yeast, and a small amount of sugar or olive oil; weigh ingredients with a digital scale and measure temperature with a thermometer. You’ll also gather a reliable stand mixer with a dough hook or a sturdy mixing bowl and your hands for kneading. Use a bench scraper, dough scraper, and clean surface for dividing and shaping. Have a pizza peel, baking steel or stone, and an oven thermometer to confirm heat. Prepare proofing containers, plastic wrap or lids, and parchment for transferring. Keep measuring spoons, a timer, and a spray bottle of water nearby. Each tool promotes consistent results and efficient workflow and speeds predictable, repeatable results.
Dough Chemistry: Flour, Hydration, and Yeast

You select flour by protein percentage to control gluten strength and the crust’s chew. You set hydration to achieve the dough texture you want—higher for openness and extensibility, lower for a tighter, easier-to-shape ball. You control yeast amount and fermentation time to regulate activity, flavor development, and oven spring.
Flour: Protein and Strength
Because flour’s protein content determines gluten-forming potential, it directly controls dough strength, elasticity, and water absorption. You choose flours by protein percentage: 9–11% for tender crusts, 12–14% for strong, extensible New York-style doughs. Higher protein yields more gluten bonds during mixing and fermentation, so you get greater windowpane tolerance and oven spring control. If you’re blending flours, balance strength with extensibility by mixing bread and all-purpose flours. Measure by weight, not volume, to maintain predictable protein-to-flour ratios. Be aware that milling, age, and ash content subtly affect protein performance; adjust mixing time and yeast accordingly. When testing, perform a simple windowpane and tackiness check to confirm the dough’s structural readiness before proofing. You’ll favor higher-protein flour for strength, but monitor texture and extensibility carefully.
Hydration: Dough Texture
If you adjust hydration, you’ll directly tune the dough’s tackiness, extensibility, and gas-retention—traits that determine handling and final crumb. Aim for 55–62% for a classic New York thin, which gives enough strength to stretch thin without tearing and sufficient extensibility to form a consistent rim. Increase to 63–68% for a more open crumb and pronounced blistering; decrease to 50–54% for stiffer dough that resists over-proofing and yields a denser crumb. Measure water by baker’s percentage relative to flour weight and use a scale accurate to ±1 g. Mix until gluten develops but avoid overworking; allow brief autolyse and rest so flour hydrates fully. Adjust incrementally and record results. Seasonal flour absorption varies, so adapt hydration per batch and document ambient humidity and outcomes consistently.
Yeast: Activity and Timing
When you control yeast activity precisely, you shape both rise and flavor: choose strain and dose by target fermentation temperature and schedule, weigh yeast to the gram, and adjust time rather than guessing by volume. You’ll select instant or active dry yeast based on how quickly you want gas production; instant tolerates shorter, warmer ferments, while reduced doses suit cold, slow retards. Calculate yeast as a percentage of flour—0.1–0.5% for long cold fermentation, 1–2% for same-day rises. Monitor dough temperature; a 1°C change roughly doubles or halves activity across ranges. Use bulk and final-proof timing as controls: cool retardation slows enzymatic development and sharpens flavor, brief warm proofs prioritize lift. Keep records and replicate successful schedules. Small adjustments yield consistent crust and predictable results.
Mixing and Kneading Techniques

Start by measuring ingredients precisely and combining water and yeast first to guarantee even activation. Add flour and salt, then olive oil; mix until shaggy dough forms. You should use a dough scraper and bowl-turn technique to consolidate ingredients without overworking. If using a stand mixer, use the dough hook at low speed for four to six minutes until dough clears the bowl and becomes cohesive. Hand-knead on a lightly floured surface for eight to ten minutes, employing push-fold-turn motions to develop gluten; the dough should become smooth, elastic, and tacky. Test for windowpane by stretching a small piece until it thins without tearing. Adjust with minimal flour or water to hit consistency. Rest between intensive kneading sessions to relax gluten and maintain control.
Bulk Fermentation and Cold Proofing
Because bulk fermentation builds structure and flavor, you’ll manage it deliberately: leave the dough in a lightly oiled bowl at room temperature (75–78°F/24–26°C) until it rises about 20–30% and shows visible gas bubbles—typically 60–90 minutes with active yeast—performing a set of gentle stretch-and-folds every 30 minutes to strengthen the gluten without over-degassing. After bulk, transfer the dough to a lightly oiled airtight container and cold-proof to slow yeast activity and develop acidity and aroma. Chill 18–72 hours at 35–40°F (2–4°C). Cold proof improves extensibility, browning, and flavor concentration. Remove to temper 30–60 minutes before use and inspect for relaxed, slightly domed dough.
- Pale, taut skin with tiny pinhole bubbles
- Cool, yeasty aroma with a hint of tang
- Smooth, satiny surface under light oil
- Gentle, pillowy resistance when pressed
- Even, translucent gluten strands when stretched
Portioning, Rounding, and Resting
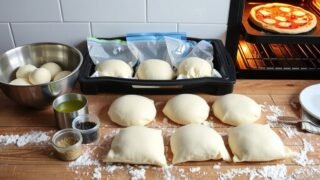
After chilling, you’ll portion the dough by weight—typically 10–16 oz (280–450 g) per pie depending on pan size—so each crust bakes uniformly; use a digital scale, divide the cold mass into even pieces, and gently degas only enough to make clean seams. Then round each piece into a tight boule by cupping your hand and rotating against a work surface, creating surface tension that aids oven spring. Place balls seam-side down on a lightly floured tray or proofing box, spaced to avoid sticking. Cover loosely with plastic or damp cloth to prevent skinning. Rest at room temperature 45–90 minutes for relaxed gluten and easier shaping, or refrigerate briefly if you need more time; monitor feel, not just clock time. Adjust times for dough activity.
Stretching and Shaping a Thin Crust
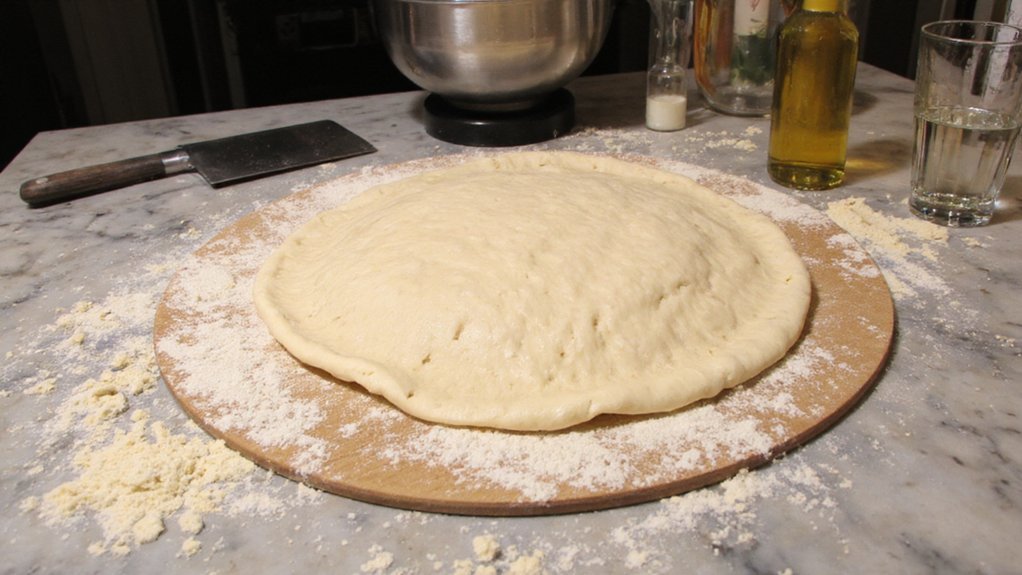
Working the chilled dough at room temperature, you’ll handle each ball gently until it’s relaxed and pliable—about 10 to 20 minutes depending on room warmth—so you can stretch it without tearing. Rested dough should feel supple; dust your hands and surface sparingly with flour to prevent sticking without drying. Start from the center, pressing outward with your fingertips to form a uniform disk, leaving a slightly thicker rim for the crust for structure and crispness. Use gravity and controlled rotation to expand the dough by draping over knuckles and turning, keeping tension even to avoid holes. Transfer to a well-floured peel or parchment with minimal handling to retain shape.
- pale, glossy dough
- thin, even center
- soft elastic texture
- faint stretch marks
- clean floured surface
Baking: Mimicking Pizzeria Heat at Home
You should push your oven to its highest safe temperature and preheat thoroughly to approximate pizzeria conditions. Choose a baking steel for rapid, intense bottom heat or a stone for steadier, even conduction, and preheat it for 45–60 minutes. Finish pizzas briefly under the broiler to sear and bubble the top, watching closely to prevent charring.
Oven Temperature Tricks
Replicate a pizzeria’s blistered crust by maximizing your oven’s radiant heat and reducing the gap between dough and source: preheat a pizza stone or steel on the highest setting for at least 45 minutes, place the rack as close to the element as safely possible, and use the broiler for the last 60–90 seconds to emulate the searing top heat of a deck oven. You’ll control color and char by timing, positioning, and brief high-intensity broiling; monitor closely and rotate once for even blistering.
- Thin, glossy crust rushing under white-hot heat
- Rapid lift and oven-spring along the rim
- Small, leopard-like charred spots on the surface
- Fast cheese bubble and slight browning at the edge
- Crisp underside with audible crack when bent
Adjust in thirds.
Baking Steel Vs Stone
While a stone absorbs and radiates heat gradually, a steel conducts and delivers intense, immediate heat that more closely mimics a pizzeria’s deck oven—so choose based on the outcome you want. A steel gives faster bottom browning and crisper crust in minutes; you should preheat it longer to stabilize temperature and avoid scorching. A stone provides gentler, even heat that reduces risk of burning and yields a slightly chewier interior; you should heat it thoroughly and use a peel to slide pies quickly. Consider weight, thermal mass, and responsiveness: steel is lighter for thermal transfer per thickness, stone retains heat but responds slowly. Select steel for speed and blistered crust, stone for forgiveness and even cooking, and easier maintenance if you value durability, too.
Broiler Searing Technique
After selecting steel or stone, harnessing your oven’s broiler supplies the intense top heat that a pizzeria’s deck delivers. Position the rack one notch below the broiler, preheat steel or stone to 550°F for 45 minutes, slide the pizza onto the hot surface, broil 1–2 minutes while watching, then lower heat to finish crisping. This sear yields Maillard browning on cheese and blistered crust without overcooking. Use visual cues and timed intervals; you’ll reproduce the blistered, smoky finish reliably. Watch for deep golden color, scattered char, rapid cheese browning, a crisp snap, and a toasty aroma.
- molten cheese bubbling with brown specks
- rapid blistering along the crust edge
- faint smoky mottling on top
- crisp bottom giving a resonant tap
- golden bubbles and charred flecks
Toppings, Baking Timing, and Finishing Touches
When you move to toppings and baking, be deliberate: use light, evenly distributed sauce and a moderate amount of high‑moisture cheese so the thin New York crust stays crisp, not soggy. Place toppings sparingly—thinly sliced meats, drained vegetables and fresh basil—so steam won’t accumulate. Preheat your oven and stone to 500–550°F; transfer pizza quickly to maintain temperature. Bake six to eight minutes, watching for blistered, charred spots and a golden rim. If using a broiler sear, finish thirty to sixty seconds under high heat to crisp the top without overcooking the bottom. After baking, rest the pie one to two minutes, add finishing oil or grated hard cheese, slice with a sharp rocker, and serve immediately for ideal texture and maximum enjoyment and flavor.
Conclusion
Follow these steps and you’ll consistently turn out authentic New York–style pies. Use high‑protein flour, 60–62% hydration, minimal yeast, and measured salt; mix until cohesive, rest, and perform gentle stretch‑and‑folds during bulk fermentation. Cold‑proof 24–48 hours, temper dough before shaping, stretch thin from the center leaving a defined rim, and bake on a preheated steel or stone at 500–550°F until crisp and leopard‑spotted. Trust the process and refine your technique.