You want consistent, blistered crusts and efficient workflow in your home kitchen. Focus on the right peels, stones or steels, cutters, and measuring tools. Precision matters: scales, thermometers, and dough-handling tools change outcomes. You’ll see which tools make the biggest difference, how to use them, and what to skip…
Pizza Peel
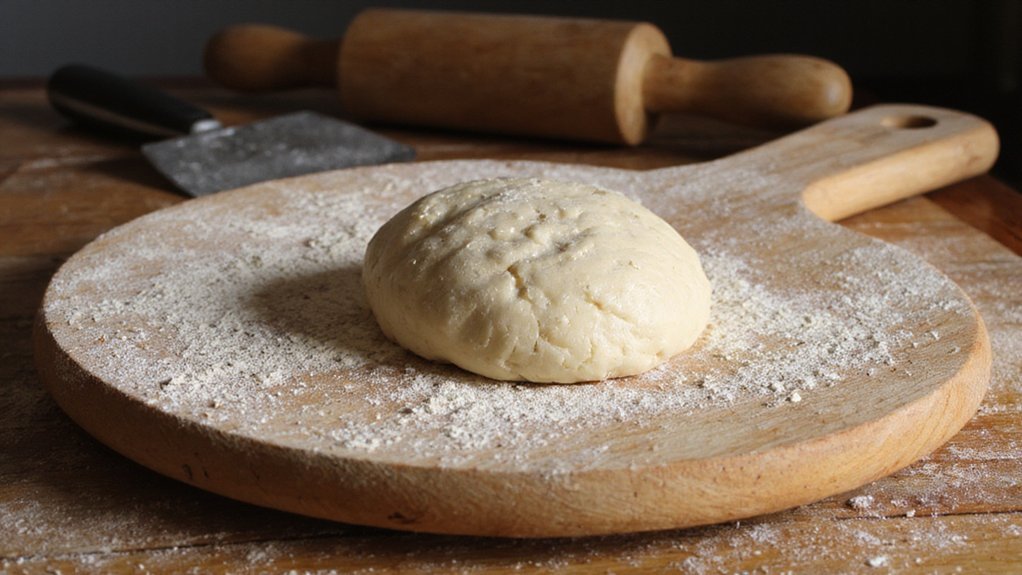
A pizza peel is the essential tool that gets your raw pie onto a hot stone or out of the oven without losing shape or burnishing the crust; you’ll choose between wooden, metal, or perforated designs based on dough stickiness and oven type. You’ll work with peel length, blade thickness, and handle ergonomics: longer handles reach deeper ovens, thinner blades slide under fragile dough, and tapered edges free pies cleanly. Wood grips flour well and won’t chill dough, metal won’t warp and tolerates heat, perforated peels reduce drag and excess flour. You’ll maintain your peel by keeping it dry, sanding wooden surfaces periodically, and avoiding dishwashers. Match peel choice to your technique and oven for reliable, repeatable results. You’ll gain consistent pies every time.
Pizza Stone and Steel
Choose the right thermal surface and you’ll transform your oven into a consistent, high-heat pizza oven: stones store lots of heat and draw moisture from the dough for a crisper bottom, while steels transfer heat far faster and give you quicker rise and blistering. Pick a cordierite or ceramic stone if you want even retention and gentler thermal shock resistance; expect longer preheat times. Choose a tool steel or carbon steel plate for maximum conduction, thin profiles, and intense bottom browning—preheat on the lowest rack. Use an infra-red thermometer to verify surface temperature. Maintain by scraping and minimal soap washing once cooled; avoid thermal shock. Size to your peel and oven, and clamp or set on a rack to prevent movement during loading safely.
Pizza Ovens
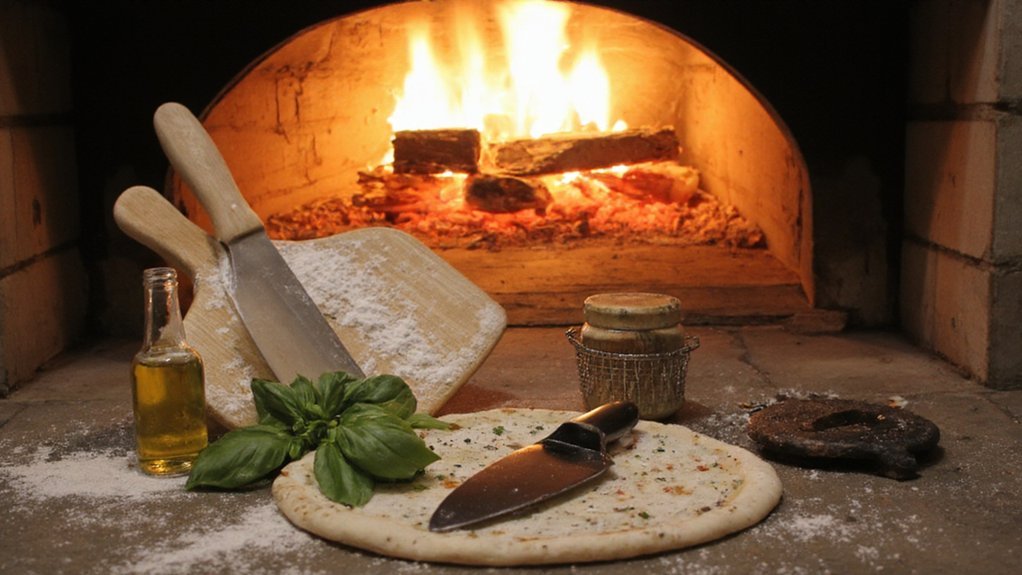
You should compare heat source, max temperature, and ramp-up time—wood-fired ovens reach 700–900°F for quick blistering and smoky flavor, while gas gives steady high heat with push-button control. Electric ovens run cooler, but you can optimize them with a stone or steel and a calibrated thermostat for repeatable results. Choose based on the crust style you want, your installation limits, and how hands-on you’re willing to be, since each option demands different technique and yields distinct flavor.
Wood-Fired Vs Gas
When comparing wood-fired and gas pizza ovens, weigh heat range, control, flavor, and hands-on effort because each delivers distinct results you’ll notice the first bite. You’ll get blistered char and smoky complexity from wood; peak temperatures often exceed 800°F, creating rapid rise, leopard spotting, and ripe charring. Wood demands fuel management, ash removal, and thermal mass awareness, so you’ll monitor burn patterns and chamber temperature. Gas offers stability: instant ignition, precise thermostat-like control, and easier repeatability for consistent crust and bake times. Gas sacrifices some smoke-driven nuance but reduces labor and learning curve. Choose wood if you prioritize artisanal char and sensory depth; pick gas if you want predictable performance, quicker startup, and tight temperature control for reproducible pies and better workflow in kitchens.
Electric Oven Options
Although electric ovens rarely hit wood-fired peaks, they deliver precise, repeatable heat that makes consistent pies possible. You’ll choose from countertop pizza ovens, convection ranges, and deck-style electric units; each offers controlled temperature profiles and predictable thermal mass. Look for rapid preheat, element placement, and a stone or steel baking surface to emulate radiant floor heat. Programmable thermostats, PID controls, and multiple heating zones let you dial in crust char, blistering, and bake time. Electrical capacity and ventilation matter—confirm amperage and clearance before upgrading. Maintenance is straightforward: clean elements and rotate stones for even wear. If you want reliable results night after night, an electric oven is a logical, efficient, and technically sound investment. You’ll master repeatable bakes faster with measured temperature control consistency.
Pizza Cutter and Server
Grab the right cutter and server and you’ll slice cleanly and plate confidently. Choose a heavy-duty wheel or a rocker blade: stainless steel resists corrosion and holds an edge, while a rocker gives straight cuts through thick toppings. Look for a 3 to 4 inch wheel or a 10 to 12 inch rocker with a full-tang handle for leverage. Make sure the server is thin, rigid, and slightly tapered so you can slide under slices without deforming the crust; perforated servers drain grease and prevent soggy bottoms. Prioritize replaceable blades, ergonomic non-slip grips, and heat-resistant materials. Use firm, single pulls or rocking motions, and support the slice with the server at a shallow angle. Clean and dry components immediately to maintain performance and food safety.
Stand Mixer and Dough Tools
Tackle dough with the right stand mixer and hand tools to get consistent, well-developed gluten without overworking the yeast. You want a mixer with planetary action, variable speed and a dough hook that folds efficiently; use short mixing bursts and rest periods to monitor development. Keep a bench scraper, dough docker, silicone scraper and a set of long-handled tongs ready for shaping and transfer. Clean, sturdy tools save time and preserve dough structure.
| Tool | Purpose |
|---|---|
| Stand mixer (dough hook) | Mixes and kneads efficiently |
| Bench scraper | Divides and lifts dough |
| Silicone scraper | Cleans bowls, folds dough |
| Long-handled peel/tongs | Transfers pizza to oven |
Practice controlled mixing, check windowpane regularly, and trust tactile feedback. Upgrade components as you progress for durability and consistent results.
Digital Kitchen Scale
A compact digital scale will give you the repeatable precision your dough recipes demand, so you can hit hydration percentages and yeast ratios every time. You’ll measure flour, water, salt and starter by weight for consistent doughs; grams are non-negotiable for control. Choose a scale with a 1 g resolution, stable platform and reliable tare so you can zero bowls and build formulas quickly. Durable surfaces and easy-to-clean design save time. Calibrate occasionally with known weights and replace batteries proactively to avoid surprises mid-bulk ferment. Look for stainless steel platforms and a clear LCD for fast reads. Key features to prioritize:
- 1 g accuracy (0–5 kg range)
- Quick tare and spill-resistant surface
- Compact footprint for storage
- Long battery life, auto-off
Thermometers
Your thermometer’s accuracy shapes every stage of pizza making, from dough temp to blistered crust. You need at least two: an instant-read probe for oven/blister checks and an infrared gun for surface temps. For dough, measure internal temperature of dough mass and aim for 24–27°C (75–80°F) for ideal fermentation control. Use a thin, fast-response probe (0.5–1 sec) to avoid heat soak when checking crust or finished pie. Calibrate regularly with ice-point and boiling-point tests; adjust for elevation. Choose waterproof, food-grade probes with wide range (−50–300°C) and clear digital readouts. In high-heat ovens, keep probes away from flames and use thermocouple types for fastest, most reliable readings. Accurate temp data cuts guesswork, improves consistency. You’ll dial in ferments, bake profiles, and repeatable results faster, consistently.
Proofing and Storage Containers
You need the right dough-proofing bowls to control fermentation and handle volume—pick materials and sizes that retain warmth, resist sticking, and are easy to seal. Consider proofing box options, from DIY insulated cabinets to commercial units, to deliver consistent temperature and humidity. And plan refrigeration and freezing workflows so you can cold-ferment for flavor or store dough long-term without sacrificing texture.
Dough Proofing Bowls
Choosing the right proofing bowl lets you control fermentation, hydration, and dough handling from bulk mix to final stretch. You want a bowl that’s inert, non-reactive, and sized for dough growth so you can monitor rise and gas retention. Look for smooth surfaces that release dough, tight-fitting lids to retain humidity, and graduated markings for precise hydration targets. Durable plastic, stainless steel, or glass each have trade-offs in thermal response and weight; choose based on your workflow. Maintain strict cleanliness to prevent off-flavors and gluten degradation.
- Capacity: allow 2–3× final dough volume
- Material: non-reactive, easy-clean
- Shape: tall for vertical rise, shallow for bulk folding
- Features: lid, markings, stackability
You’ll refine your choice as you test temperatures, timings, and techniques daily.
Proofing Box Options
After picking the right proofing bowl, it’s worth matching it to a proofing box that keeps temperature and humidity stable so your fermentation behaves predictably. You’ll choose between DIY insulated boxes, commercial proofers, and simple warm cabinets. Look for precise temperature control (±1–2°C), dampness management—tray with water or humidity probe—and easy access to racks for multiple containers. Materials should resist condensation and be food-safe; plastic-lined interiors and stainless steel shelves work well. Consider size relative to batch volume and airflow layout to avoid cold spots. Portable, thermostatic units suit small kitchens; professional cabinets handle higher throughput. You’ll prioritize repeatability: a box that logs or holds setpoints will let you reproduce crumb structure and flavor reliably across bakes. Monitor with infrared thermometer and humidity sensor.
Refrigeration and Freezing
While refrigeration slows fermentation and freezing halts it, the containers you pick determine dough integrity, moisture control, and handling efficiency. Choose food-grade airtight containers with smooth corners to prevent sticking and bacterial traps. Stackable rigid boxes save space and protect dough from crushing; flexible bags work for single balls but need careful seam sealing. Labeling and date windows let you rotate stocks and monitor cold retardation time. Temperature stability matters—avoid frequent door opening that causes recrystallization in frozen dough. Use acid-resistant clear materials to inspect dough without opening. Cleanability, thermal mass, and workflow compatibility are nonnegotiable. Optimize container volume to minimize headspace and preserve hydration.
- Airtight plastic
- Rigid stackable boxes
- Freezer-grade bags
- Lidded dough trays
Pick containers that fit your kitchen and volume needs.
Baking Racks and Frames
A sturdy steel rack gives you predictable airflow and consistent crust development when you bake multiple pizzas at once. Choose open-wire racks with stainless steel or chrome plating to resist warping and corrosion under high heat. You’ll want spacing that lets hot air circulate without letting toppings drip onto lower pies; one to one-half inch shelf gaps work in most ovens. Heavy-gauge frames maintain flatness and prevent sagging as trays slide in and out. For commercial or large batch use, buy mobile rack carts with locking casters for transport. If you use a deck or stone oven, select heat-tolerant frames that sit flush and don’t insulate the stone. Cleanability matters: removable shelves and welded seams reduce food traps. Proper racks amplify consistency and speed.
Hand Tools (Brushes, Scrapers, Pans)
Now you’ll focus on the hand tools that do the finishing work: brushes, scrapers, and pans—all small items that control crust texture and dough handling. Use dough brushes to apply oil, egg wash, or to clear excess flour, and choose scrapers by task—rigid metal bench scrapers for portioning, flexible plastic or silicone scrapers for folding and cleaning, and round bowl scrapers for mixing. Pick pizza pans and trays (perforated steel, solid carbon steel, cast, or nonstick) based on heat transfer and desired crust crispness, because pan choice changes bake time and crunch.
Dough Brushes and Uses
Brushing dough with the right tool gives you precise control over surface moisture, coatings, and finishing textures. You’ll choose brushes for tasks where accuracy matters: sealing seams, adding oil or egg wash, dusting flour, or tamping toppings. Select a brush with food-grade bristles—silicone for durability and clean lines, natural for gentle absorption. Maintain hygiene by cleaning immediately, drying fully, and replacing worn bristles to avoid contamination.
- Seal seams and edges with light oil to prevent drying.
- Apply egg wash or butter for color and blister control.
- Remove excess flour without deflating the dough.
- Lightly tame loose toppings before transfer to the oven.
Practice deliberate strokes; your technique impacts crust and bake consistency. Adjust pressure and angle to refine your results.
Dough Scrapers: Types
After tending the dough’s surface with a brush, you’ll reach for scrapers to shape, portion, and move the mass without tearing it. Choose a stainless steel bench scraper for heavy-duty cutting, weighing and clean-edge transfers; its rigid blade gives precise corners and dough division. Use flexible plastic scrapers to scoop and fold softer, wetter doughs; they flex around bowls and minimize tearing. Silicone scrapers handle sticky residue and work at high temperatures — great for hot pans but avoid discussing pans here. Curved bowl scrapers conform to mixing bowls for efficient scraping. Ergonomics matter: look for a comfortable edge radius and non-slip grip. Match scraper material and stiffness to your dough hydration and workflow for consistent results. Experiment to find your perfect combination today.
Pizza Pans and Trays
A solid, well-chosen pan will make or break your crust: you’ll pick heavy-gauge steel or cast iron for fast, even browning, aluminized or anodized aluminum for quick heat response with less weight, and perforated or mesh trays when you want maximum airflow and an extra-crisp edge.
- Heavy steel/cast iron: mass for steady heat and char.
- Aluminized/anodized aluminum: quick response, lighter handling.
- Perforated/mesh: superior airflow and crisp edge.
- Stone-like pans: mimic hearth ovens with radiant heat.
You’ll weigh conductivity, mass, and surface finish because each alters bake time and crust structure. Use heavy pans for blistering, lighter pans for faster color, and perforated trays to reduce sogginess. Maintain pans by avoiding thermal shock, seasoning cast iron, and cleaning to protect coatings.
Conclusion
You’ll get consistent, restaurant‑quality results when you equip yourself with the right tools and maintain them properly. Use a tapered peel for safe transfers, a steel or cordierite surface for fast, even heat, precise scales and thermometers for reproducible dough, and heavy cutters and thin servers for clean slicing. Proofing boxes, sturdy racks, and reliable mixers speed workflow. Invest in durable hand tools and care routines, and you’ll consistently make better pizza at home today.