To nail thin crust pizza, start with high-protein bread flour for that perfect crunch. Master dough by mixing ingredients, letting it rest, and gently kneading. When it comes to toppings, keep it classic with mozzarella or get creative with feta and fresh veggies. Bake at a high temp on a pizza stone for that crispy crust. If you run into issues like sogginess or tough dough, don’t worry—there are easy fixes. Discover more tips to perfect your pizza!
Key Takeaways
- Use bread flour for higher protein content, enhancing gluten development for a chewier texture in thin crust pizza.
- Opt for a hydration level around 60% to achieve a crisp crust without sogginess.
- Preheat your oven to at least 475°F and place the pizza stone on the lowest rack for optimal heat.
- Roll the dough as thin as possible and avoid overloading it with toppings to maintain crispness.
- Allow the dough sufficient resting time to develop elasticity and avoid tough crusts.
Choosing the Right Flour for Thin Crust Pizza
When it comes to crafting the perfect thin crust pizza, the flour you choose is like the foundation of a great house—essential for everything that follows. You’ve got options, and each flour type brings its own vibe. For that delightful crunch, look for bread flour; it’s got a higher protein content, which ramps up gluten development. For a softer texture, all-purpose flour might just do the trick, giving you that tender bite.
Now, don’t forget about hydration levels! If you want a crisp crust, keep the water content lower. Too much moisture can lead to a soggy situation. A dough with about 60% hydration typically works wonders, balancing chewiness with that satisfying crunch. Experiment a bit, and you’ll discover the flour and hydration combo that suits your pizza dreams best. Happy baking!
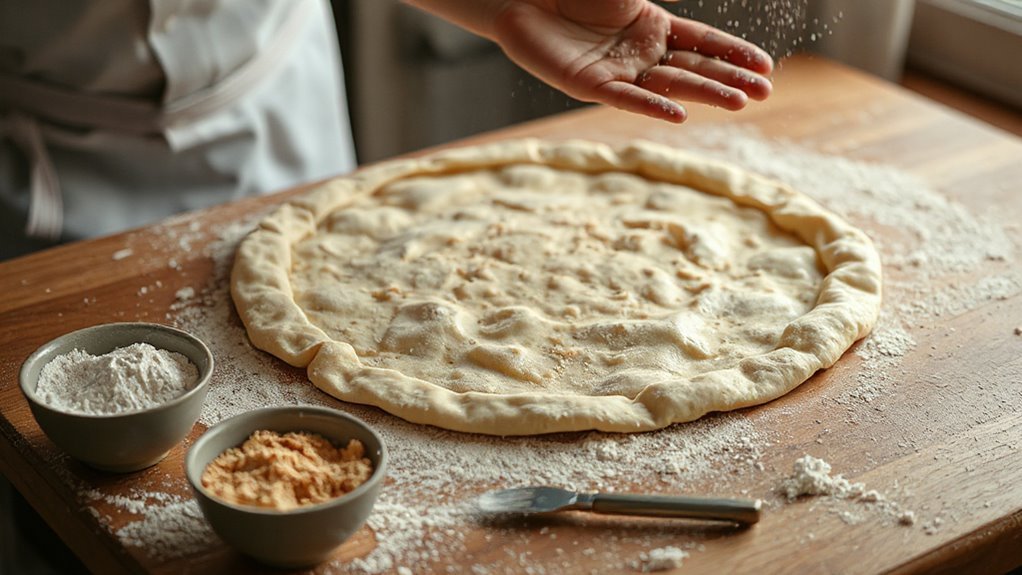
Mastering the Dough Preparation Technique
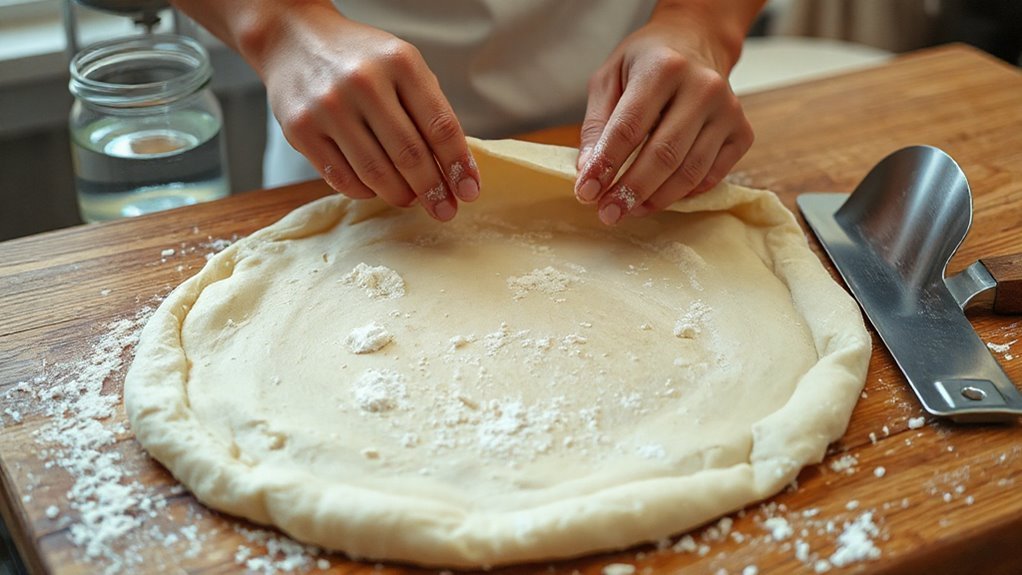
Once you’ve selected your flour and nailed down the right hydration level, it’s time to tackle dough preparation. Start by mixing your ingredients—water, flour, salt, and yeast—until they form a shaggy mass. Let it rest for about 30 minutes; this is called autolyse and helps with dough hydration.
Then, come the stretching techniques! After resting, knead it gently to build structure. Fold and stretch the dough instead of just punching it down; this keeps the gluten intact, giving you that chewy texture. You don’t want to overwork it, though—just a few minutes will do!
Once you’ve achieved a smooth ball, let it rise in a warm spot until it doubles in size. This dough is now a canvas for your pizza vision. Get ready to mold it into perfect thin crusts, and show off those skills!
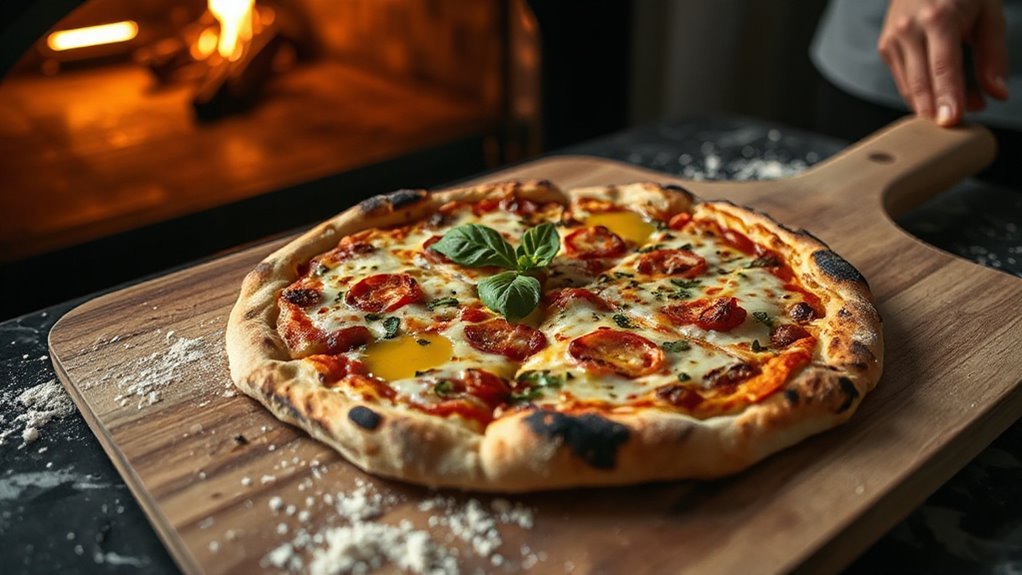
Best Toppings for Thin Crust Pizza
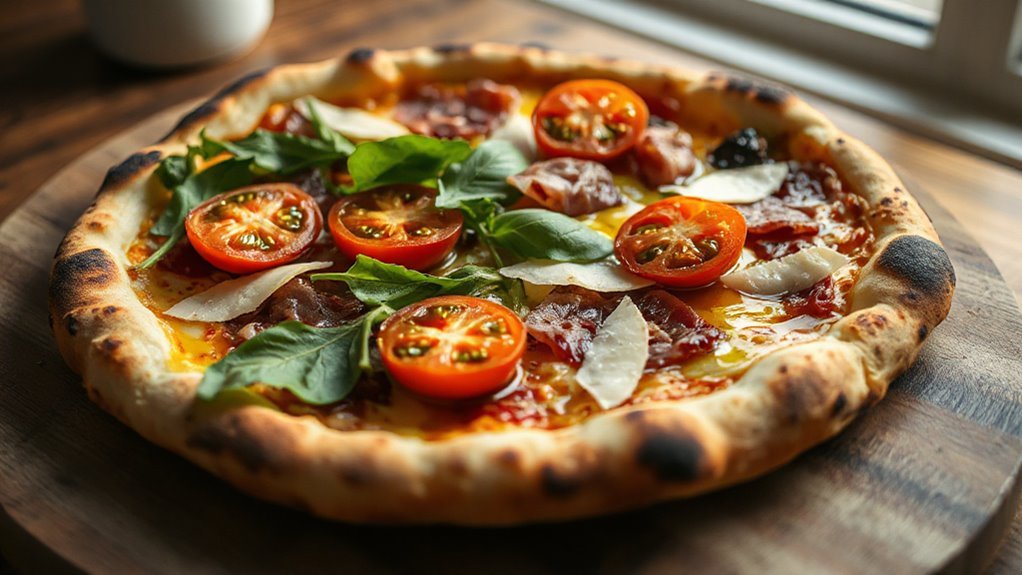
While exploring the world of thin crust pizza, you’ll quickly realize that the right toppings can elevate your creation from good to outstanding. First off, think about your sauce options; a classic marinara can be blissful, but don’t shy away from pesto or a zesty BBQ for something different. Layer that on your crust, and you’re already halfway there.
Now, let’s talk cheese combinations. Go with a traditional mozzarella for that melty goodness, or jazz it up with a bit of feta or goat cheese for a tangy twist. If you’re feeling adventurous, try some smoked gouda. And don’t forget the toppings! Fresh veggies, spicy pepperoni, or even a sprinkle of arugula right before serving can turn your pizza into a masterpiece. The key is embracing what you love—so mix, match, and create a pizza that speaks to your taste buds!
How to Bake Your Pizza Like a Pro?

To bake your pizza like a pro, it’s all about mastering your oven and knowing the right techniques. First off, preheat that oven to an impressive 475°F or even higher if you’re feeling adventurous. This heat’s essential for achieving that crispy crust you crave. Next, don’t skimp on pizza baking techniques—position your pizza stone on the lowest rack to develop maximum heat from the bottom, which helps create that perfect crunch. Remember to roll your dough as thin as it can handle, and don’t overload it with toppings. This isn’t a casserole! During baking, make quick oven temperature adjustments if needed—turn it down slightly if you notice the cheese bubbling too fast while the crust’s not done yet. Keep an eye on it, and when that cheese is perfectly golden, you’ll know you’ve nailed it. Enjoy the freedom of pizza mastery!
Troubleshooting Common Thin Crust Pizza Issues

You’ve perfected your baking technique, but sometimes things don’t go as planned with your thin crust pizza. If your crust ends up too soggy, it might be a topping balance issue. Pile on the sauce and toppings? That can weigh your pizza down. Try cutting back on the sauce or using drier toppings to keep everything crispy.
Now, if your crust is tough and chewy, that’s usually a sign of low dough elasticity. This might happen if you’ve overworked the dough or didn’t give it enough time to rest. Make sure you allow the dough to relax before stretching it out—it lets those gluten strands do their thing!
Finally, if your edges are burning while the center remains uncooked, crank up your oven temperature. A hotter oven cooks everything evenly and gives you that nice, golden crust you’re aiming for. Enjoy your pizza freedom!
Frequently Asked Questions
Can I Use Gluten-Free Flour for Thin Crust Pizza?
Absolutely, you can use gluten-free flour for thin crust pizza! There are some great gluten-free options out there, like almond flour or a pre-mixed gluten-free flour blend. Just keep in mind that the texture might be a bit different compared to traditional flour, but it can still be delicious. Experiment with flour substitutes until you find the perfect balance for your crust. Enjoy the freedom of creating a pizza that suits your diet!
How Long Should I Let the Dough Rise?
You should let your dough rise for about 1 to 2 hours, depending on the temperature. For ideal rising temperature, aim for around 70-80°F; that’ll really kick up the fermentation times. If it’s cooler, it might take a bit longer. Just keep an eye on it—you’re looking for it to double in size. Stretch that dough lovingly, and you’ll be on your way to some delicious thin crust pizza!
What’s the Best Type of Cheese for Thin Crust?
When you think of the perfect cheese for thin crust pizza, mozzarella’s your go-to. Just like a good friend, it melts beautifully without overshadowing the other toppings. You can mix mozzarella varieties, like fresh for that creamy texture and aged for a bit of tang. This blend not only enhances flavor but creates that ideal stretch we all crave. So, grab your cheese and have fun experimenting—freedom is the key!
Should I Pre-Bake the Crust Before Adding Toppings?
Yeah, you should definitely pre-bake your crust! It gives you great dough texture and helps avoid a soggy mess later. Pre-baking also allows the crust to firm up, so it holds all those delicious toppings without getting too flimsy. Plus, it cuts down on baking time for your pizza, letting you enjoy that crispy goodness sooner. So go ahead, give it a shot; your taste buds will thank you!
Can I Freeze Leftover Thin Crust Pizza?
Yes, you can totally freeze leftover thin crust pizza! Just wrap those slices tightly in plastic wrap or aluminum foil, then pop them in an airtight container. When you’re ready to indulge again, use reheating techniques like placing them in a preheated oven at 375°F for about 10-15 minutes. This’ll keep the crust crispy and delicious. Enjoy your freedom to savor that leftover goodness later on!
Conclusion
With the right flour, perfecting your dough, and picking the right toppings, you’re ready to create awesome thin crust pizzas. Just remember, practice makes perfect! Like my buddy Jake, who experimented with a mix of whole wheat and all-purpose flour. His pies went from soggy to spectacular, and now he’s the go-to pizza guy at movie nights. Get in the kitchen and start crafting your masterpiece—you’ve got this!